
Do you back up your computer with Time Machine? If you haven’t done so until now, I recommend you do it at least once now as a precaution. You don’t need to include the whole system and applications. If you want, you can also back up only your personal data. Time Machine works with a kind of incremental backup model. After you take your first backup, it continues to write the changed data over the original backup. This way you can recover, for example, a single file deleted from your folder named “Projects” 6 months ago (without touching the whole system).
You can read our previously published article about managing Time Machine local snapshots here.
Time Machine backups are not on before you activate it. You must manually go to the System Settings / General / Time Machine section and turn it on. Or alternatively, when you connect a disk to your computer, you may see a warning window asking “Should I use this disk for Time Machine?” When you confirm from this window, Time Machine will also have been turned on.
Document Versions
A version history similar to Time Machine backups is automatically kept for the documents we create on our Mac. You don’t need to do anything special to activate this. As standard, it is already active for most Apple applications anyway.
You can apply the following steps to test how document versions work with the Pages application.
1. Open the Pages application and create any document.
2. Open the Pages application and create any document.When you close the document, it will ask you where and with what name you want to save it. Give it a name and save it, for example, to the desktop.
3. Open the Pages application and create any document.Reopen the document you closed, make a few changes, and close it.
4. Open the Pages application and create any document.When you close the document, it will not ask you again “Should I save the changes?” It will save directly over the previous one.
5. Reopen the document. And to be able to see all its versions up to that moment, issue the File > Revert to > Browse All Versions command. When you issue this command, a Time Machine-like interface will appear.
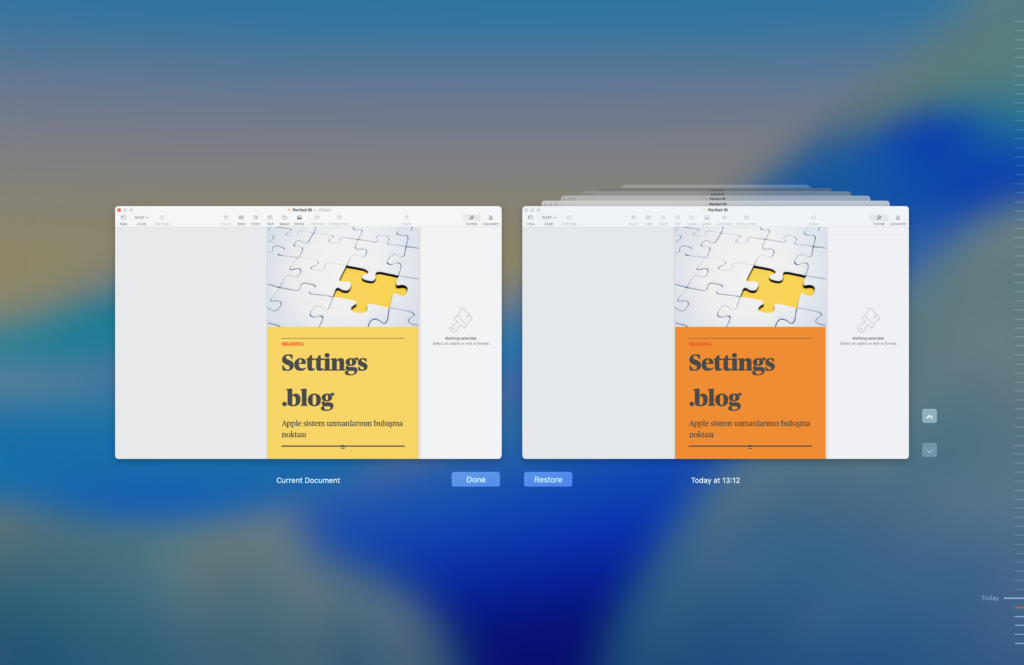
In this interface, the left side shows the current version of the document, and the right side shows its versions saved in the past. You can go on a journey through the document’s history by using the arrow keys on the far right.
Without you being aware, versions of all the documents you’ve created on your Mac until today have actually been kept automatically in this way. If you want to work the old-fashioned way — that is, if you want to be asked whether you want the document to be saved after every change you make — this is also possible. If you activate the Ask to keep changes when closing documents option located in the System Settings / Desktop & Dock section, it will ask whether you want the changes to be saved while all documents are being closed.
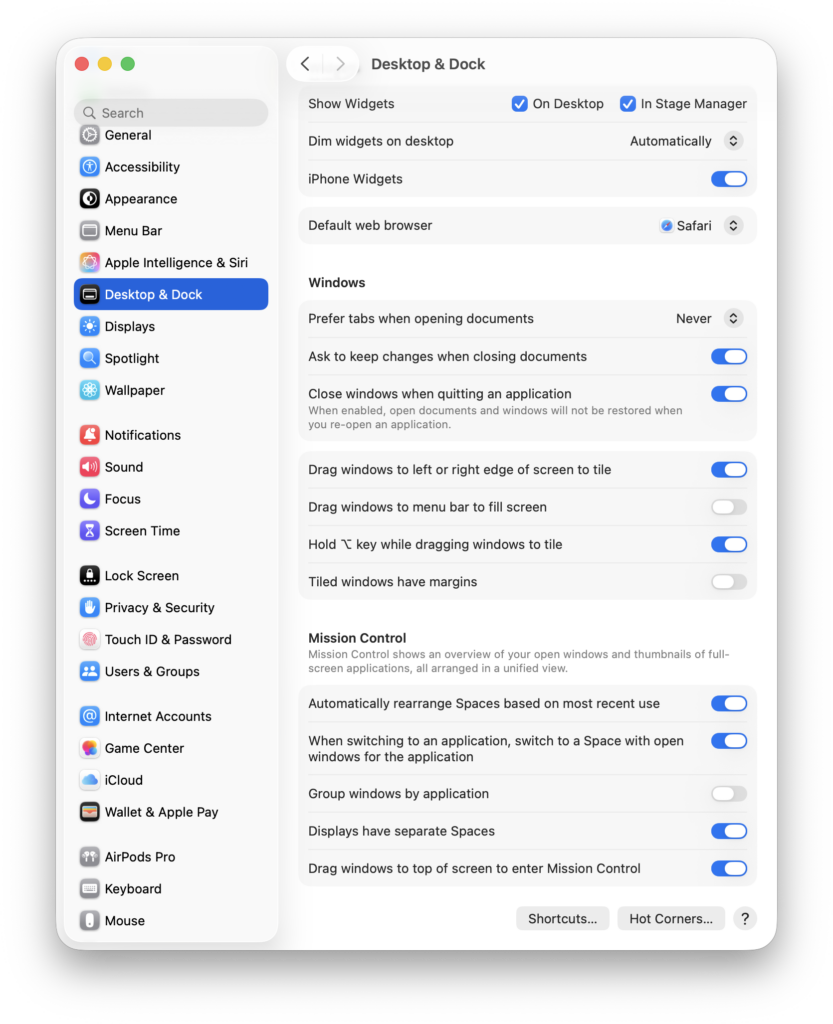
These document versions are written to a single database called .DocumentRevisions-V100. To find out how much space this database takes up on your computer, it’s enough to open Terminal and type the following.
sudo du -sh /System/Volumes/Data/.DocumentRevisions-V100Because this code begins with sudo, it will naturally ask for the Admin password. After you enter it, you get the result in a form like 2.9G /System/Volumes/Data/.DocumentRevisions-V100.
If the database accumulated so far is very heavy, you can delete all of it with the following command. But don’t forget this: the moment you do this, you will have deleted the past records — not themselves — of all the files on your computer.
sudo rm -rf /System/Volumes/Data/.DocumentRevisions-V100Document Revisions is a command group that can be used as part of the framework called NSDocument that Apple gives to developers. To see the relevant commands, you can look under the Browsing Document Versions heading at this address. In the example I gave in the lines above, I used Apple’s Pages application. Because Apple uses its own framework itself first. These developer resources are also open to other developers. But not every software company may prefer to use this structure. If you like, let’s look at how Microsoft manages document versioning in the Office suite and Adobe in Creative Cloud documents.
Microsoft Office
Files created with Office applications can use document versions in case they are stored in the OneDrive area instead of the computer’s own disk. For example, in case you save a document prepared with Word to your computer’s desktop, the Autosave function that appears in the toolbar will be off. Similarly, the File > Browse Version History option will also be inactive.
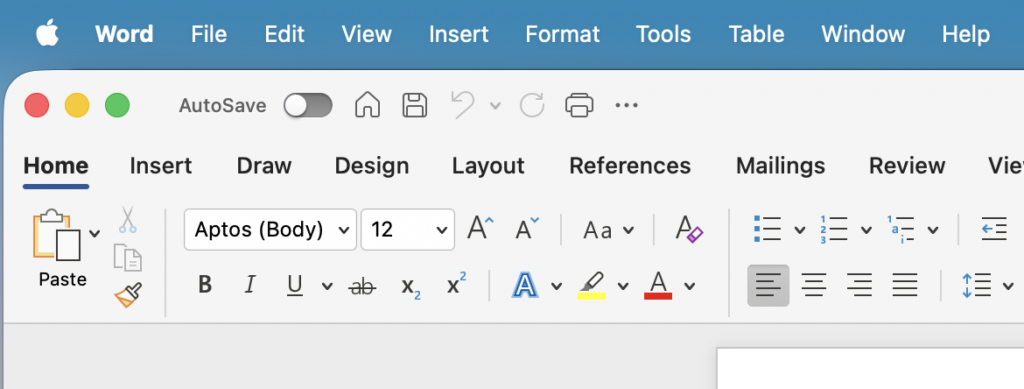
If you choose the OneDrive option instead of the desktop when saving your document for the first time, you can see that both functions are turned on. And Word will direct you to save to OneDrive first anyway.
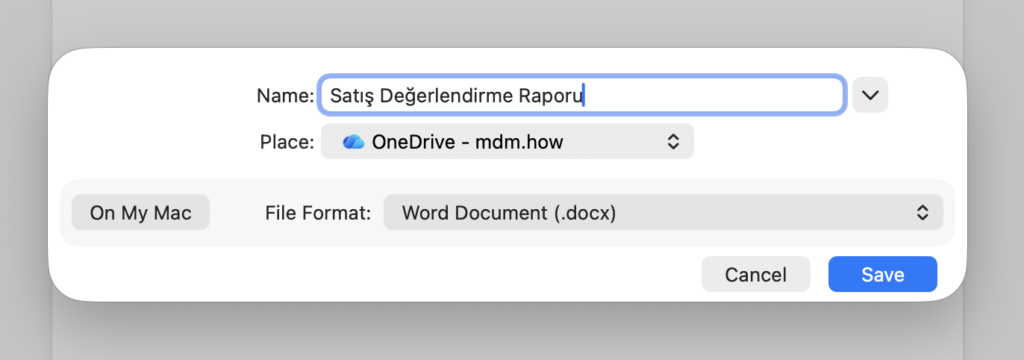
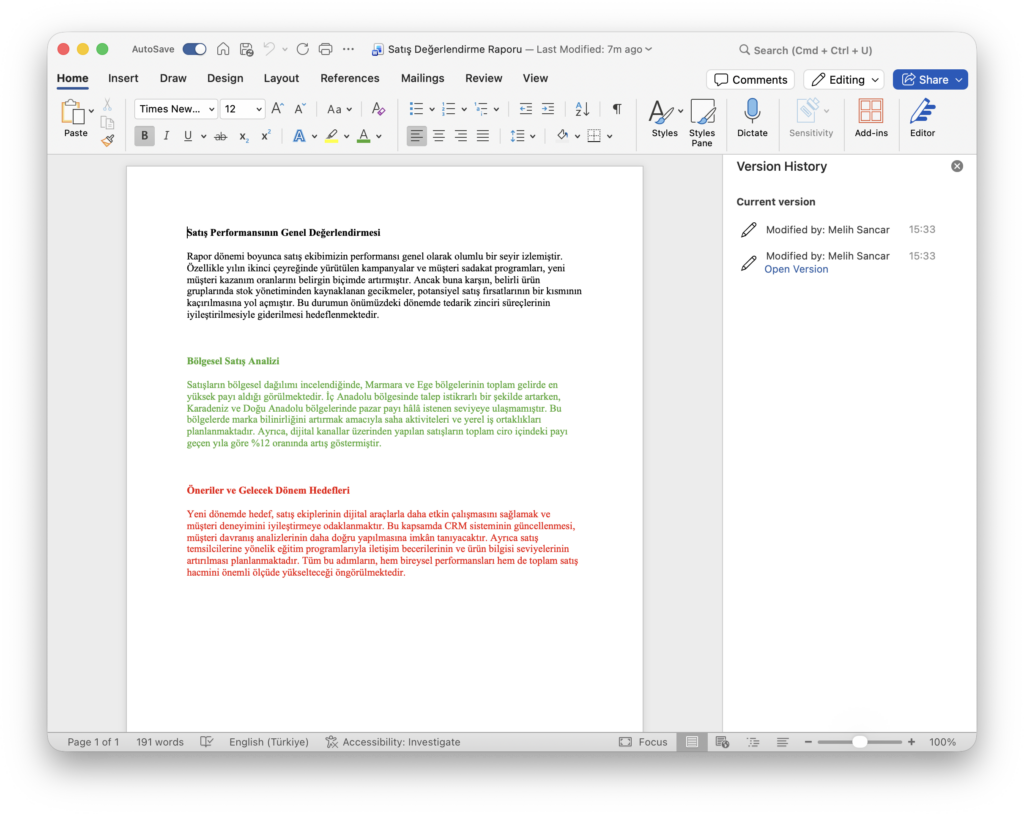
After the document is saved to OneDrive, you can see that the Autosave option and the Browse Version History menu become active. After you issue the File > Browse Version History command, a screen like the following will appear. From the Version History section on the right side, you can see a list of the document’s past versions. I know, it’s not as cool as Apple’s. But it still works.
Adobe Creative Cloud
In Adobe too, the situation shows similarity with Microsoft. When you save your documents to your computer’s local disk, you don’t have the chance to save their versions. But if you save to the cloud storage area offered to you with every Creative Cloud subscription, you can also save your documents’ versions.
As an example, if a work prepared with Illustrator is saved with the Save Cloud Document option in the Save window, every change made will automatically be saved as a version. These versions are kept in your Adobe Creative Cloud storage area for up to 30 days. You can reach the document’s old versions with the File > Version History option. On this window, all saved versions are listed with date and time information.
If you want some versions not to be deleted even after 30 days, you can mark them by clicking the small Mark sign next to them. This way, those versions continue to stay in the cloud storage area even after 30 days.
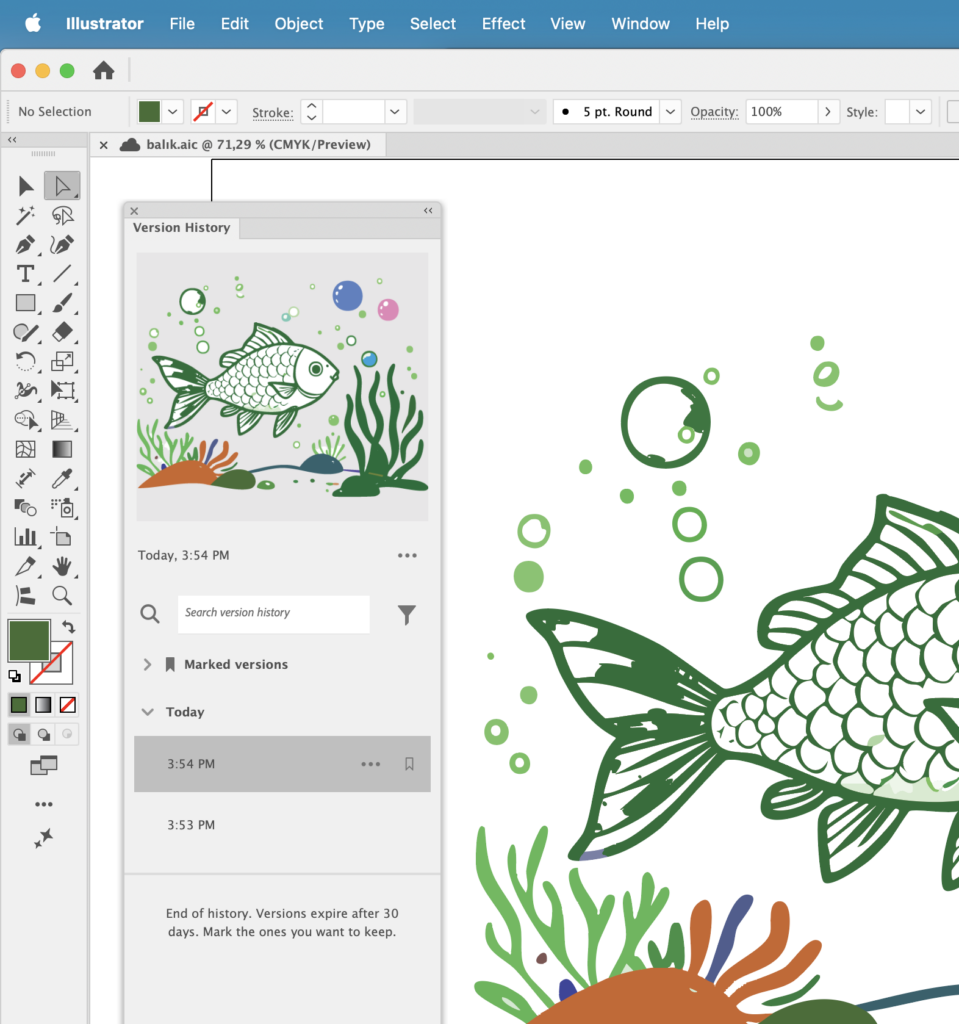
Photo by Alexander Grey on Unsplash
Leave a Reply