
Now, most of the time, when we need to reset our computers, we no longer have to format the entire disk and reinstall macOS. It’s enough to simply go to the System Settings > General > Transfer or Reset section and issue the Erase All Contents and Settings command.
However, from time to time we can experience situations where we need to install the system by formatting our computer the old-fashioned way. Although it’s a bit complicated, let me still write a scenario that could be an example of these situations:
In a situation managed with MDM where users can use the computer with Standard User privileges, you need Admin privileges for any administrative operation. For example, you may want to start the computer from macOS Recovery and format the disk. In such situations, there is usually a special Management Admin account for the use of the IT management team. Operations requiring Admin privileges can be done with that user’s account information. That account’s password information is usually rotated with LAPS, and you can only see the password information via MDM. If you don’t have access to MDM, you don’t have access to the Admin password either, and you can’t access macOS Recovery either. In just such a scenario, it may be necessary to format the device and reinstall.
From the moment Apple Silicon-processor computers first entered our lives, a concept previously found in iOS and iPadOS was added to our Mac vocabulary too: DFU Mode. DFU is the abbreviation for Device Firmware Update. Now we can also put Mac devices into DFU mode with a special method and carry out various recovery and reinstallation steps.
Requirements
To be able to put a problematic Mac into DFU mode and perform operations on it, you need the following:
• A problematic Mac to be reset. This device needs to have been manufactured after 2018 (computers that have the T2 chip or newer)
• A second Mac computer
• Apple Configurator software (the Mac version, of course). This item is not mandatory. I explain below.
• A USB Type-C – Type-C cable. (Attention, you need a charging cable. This operation is not done with Thunderbolt cables that also have Type-C on both ends)
• An .ipsw-format version of the macOS version to be installed. You can download this from Apple Developer if you want, or from third-party sites like ipsw.me.
• Coffee (if possible, try not to spill it on the computers)
• Patience
How Do We Do It?
I will explain how to do it with two separate methods. First let me convey the method explained in Apple’s article. You can read the relevant article at this address.
1. First download the macOS version from the addresses I gave above. If you haven’t downloaded it beforehand, you may have to download it again for each Mac you will Restore.

2. Connect both computers to each other with a Type-C cable. Which port you connect the cable to on the problematic computer is important. You can find the full list of DFU ports that can be used according to the computers at this address. Don’t say “Aw come on, whatever, we’ll plug it into whichever port we want, it’ll be fine.” Even between the 14-inch M4 MacBook Pro and the 14-inch M4 Pro MacBook Pro, the port to be used changes.
3. If the problematic computer is on, turn it off by pressing and holding the Power key for a while.
4. Open the Apple Configurator application on the other computer. This step is not mandatory. If you want, you can also directly use Finder to Restore the device in DFU mode.
5. If the problematic computer is an Apple Silicon-processor one (M1 and later);
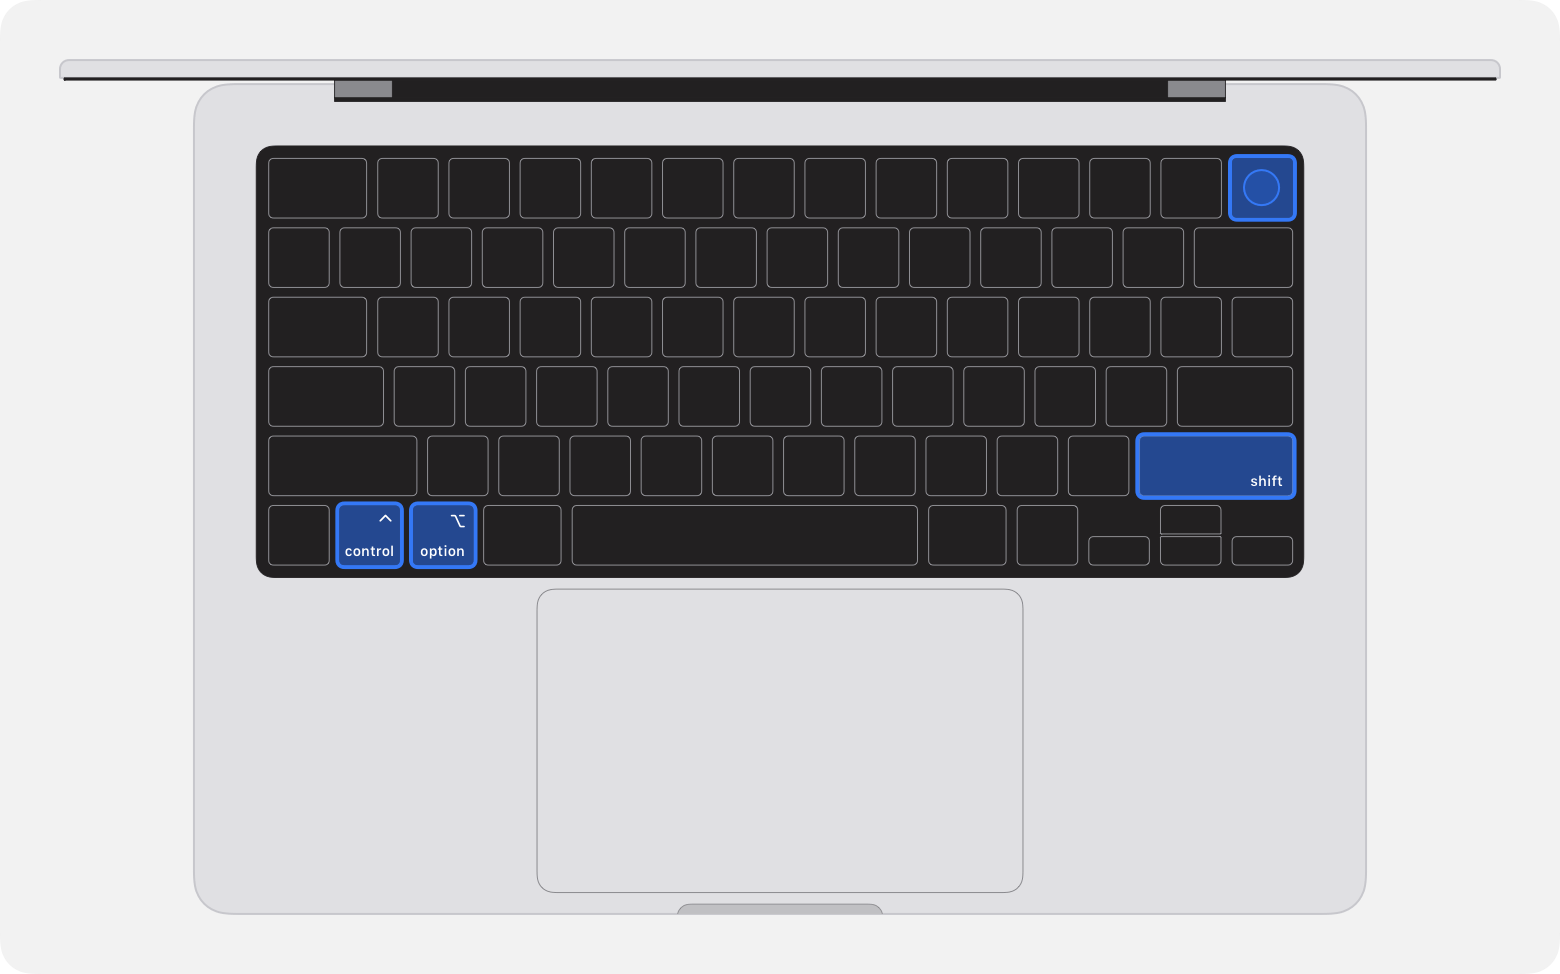
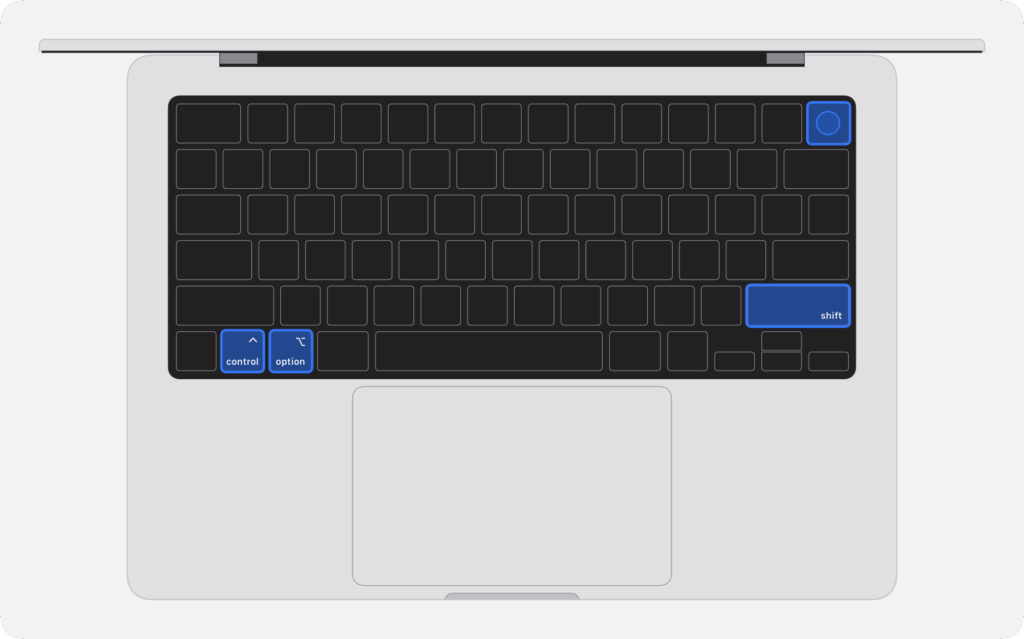
Press the left-side Control, left-side Option, right-side Shift, and Power keys at the same time and hold them down for 10 seconds. Then, removing your fingers from Control, Option, and Shift, press the Power key for another 10 seconds.
If the problematic computer is a T2-chip Intel computer (after 2018);
Press the left-side Control, left-side Option, right-side Shift, and Power keys at the same time and hold them down for 3 seconds.
5. When you see the DFU text on the Configurator screen on the other computer, it means your problematic device is now ready to perform operations.
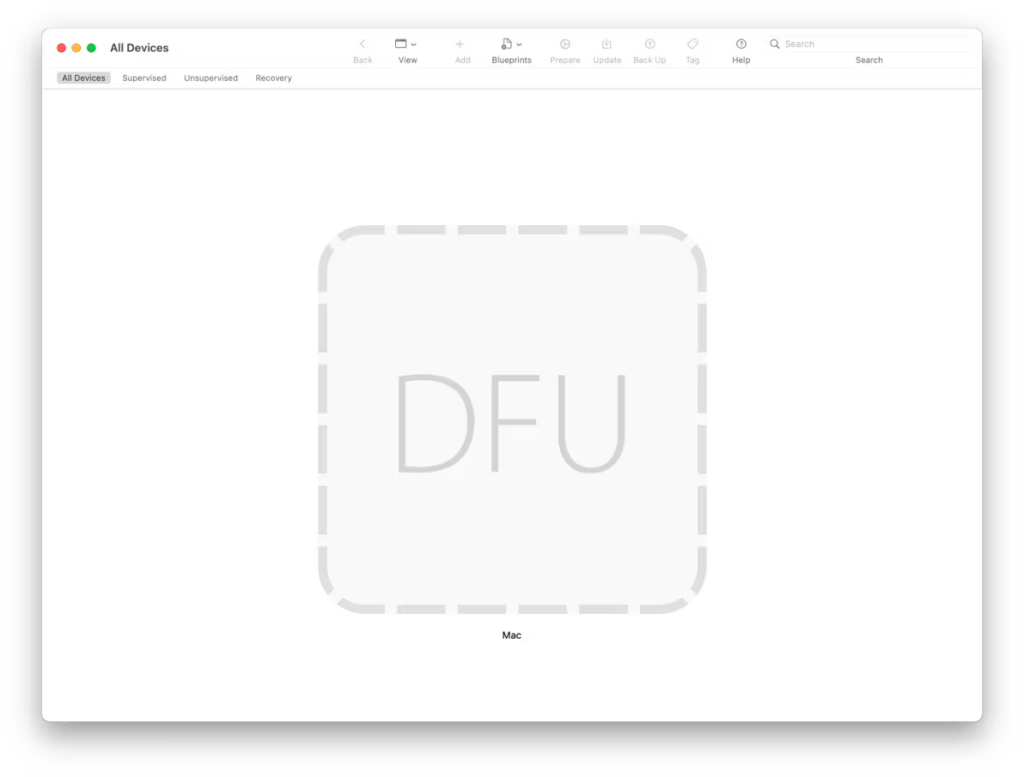
Similarly, when you see the Mac DFU Mode screen on the Finder screen, it means your problematic device is now ready to perform operations.

6. If you are using Configurator, when you right-click on the DFU text that appears on the screen, you can reinstall macOS by resetting the Mac you are having problems with by selecting the Restore option from the menu that opens; and if you are using Finder, by clicking the Restore Mac button.

In both methods, if you select the Restore option directly, it begins downloading macOS from scratch from Apple’s servers. But if you hold down the Option key on your keyboard while selecting the Restore option, it will do the installation using the operating system software you previously downloaded in .ipsw format.
What Does macvdmtool Do in This Case?
It allows you to skip step 5 of the operations I wrote step by step above. The matter of which keys to press and for how long can sometimes be very confusing. And a help desk staff member who has just started supporting Macs can miss the right point while counting the seconds. With macvdmtool, you can put a Mac directly into DFU mode without needing to press any key combination.
You can follow these steps to install macvdmtool. You will do these operations only once. Afterward, using macvdmtool is as easy as step 7 below.
1. Install Xcode on the computer you use. Xcode, as you know, is on the App Store.
2. You also need to install Xcode Command Line Tools. For this, type the following command into Terminal.
xcode-select –-install3. Using the following command, clone macvdmtool from its project on GitHub.
git clone https://github.com/AsahiLinux/macvdmtool.git4. Using the following command, you can go to the macvdmtool location.
cd macvdmtool && make5. Using the following command, move macvdmtool to the /usr/local/bin address.
sudo cp macvdmtool /usr/local/bin6. After this step, you need to open Apple Configurator, use the Install Automation Tools option from the Apple Configurator menu, and activate the command-line tool called cfgutil.

7. Now we’re ready. We need to connect the problematic Mac to the Mac we use with a cable. Without needing to use special key combinations, and without even needing to turn off the problematic Mac, it’s enough to just enter the following command.
sudo macvdmtool dfuAs a result of this, you get a response like the following in Terminal. And at the same time, you can see on Configurator that your device has entered DFU mode.
Mac type: J614sAP
Looking for HPM devices...
Found: IOService:/AppleARMPE/arm-io@10F00000/AppleH16GFamilyIO/nub-spmi-a0@9188000/AppleSPMIController/hpm0@C/AppleHPMARMSPMI
Connection: Source
Status: APP
Unlocking... OK
Entering DBMa mode... Status: DBMa
Rebooting target into DFU mode... OK
Exiting DBMa mode... OK
One More Alternative…
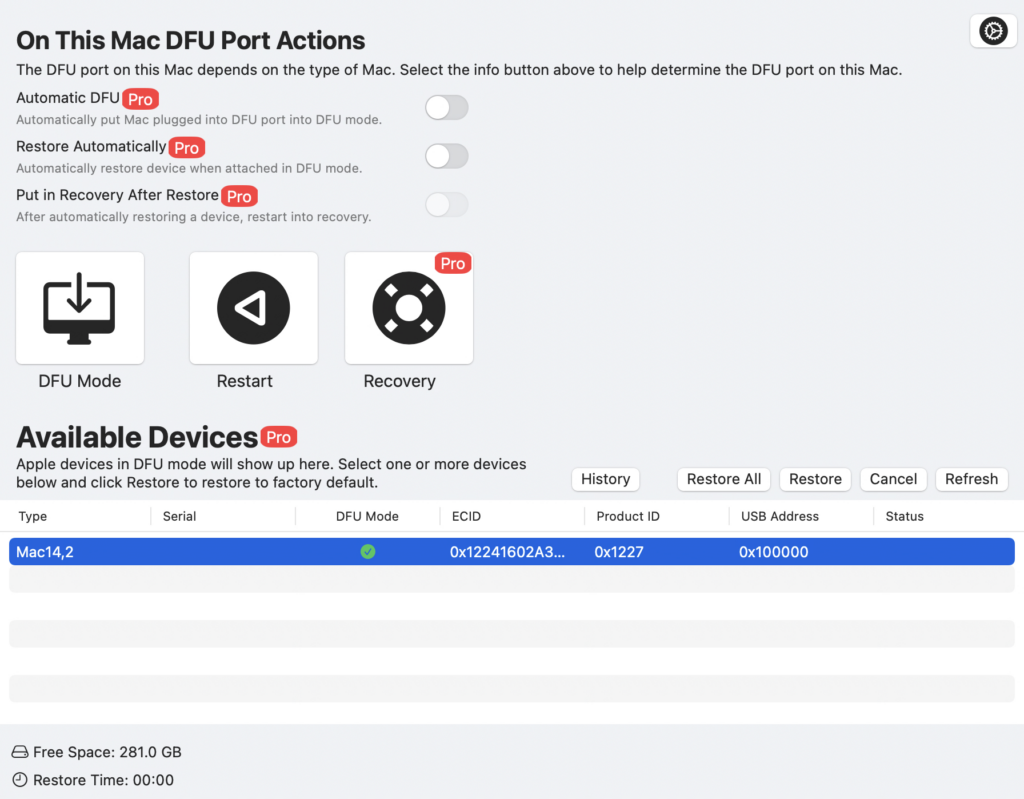
Above, I explained two separate methods for reinstalling a device you are having problems with. There is a third method. The application called DFU Blaster Pro, developed by the software company Two Canoes, does the same job as macvdmtool. Without entering as many commands as above, ready to use, you can put it into DFU mode with a single key. In fact, without even needing to press a key, it can automatically put a Mac connected to each other with a cable into DFU mode and, again automatically, start the Restore operation.
DFU Blaster Pro charges a fee of something like $99 per year in return for this service.
Leave a Reply