

It is well known to all of you that Apple has become popular in recent years not only on the end-user side but also in the corporate world. The Apple website is full of stories of large companies like IBM and SAP migrating en masse from other platforms to Mac.
In the migration stories from different platforms to Apple, even though companies at any end of the process claim ownership saying “it happened thanks to us” the truth is not quite like that.
MDM / EMM products are not software solutions that can be used out of the box like, for example, Microsoft Office or Adobe Creative Cloud. You install these products on your server or subscribe to their cloud-based services. Although the MDM solution helps you with many entry-level matters in its initially installed form, it requires some add-ons as your area of use expands. These add-ons can sometimes be a one-line script, and sometimes an application…
SAP Privileges is an application that SAP developed for its own internal use during its own — thousands of devices — Mac migration, and which it later decided to share with the Apple ecosystem.
SAP Privileges is used to grant temporary Admin privileges to Standard users. The user opens the SAP Privileges application installed on their computer, requests Admin privileges, and this right is automatically granted to them for a certain period. During this period, even if the user shuts down and restarts their computer, they can continue using it with Admin privileges if the time allotted for the Admin privilege has not expired. The Privileges application is also not the only solution that can do this. There are also solutions developed by different developers using different methods on this subject.
SAP Privileges is not a type of EPM (Endpoint Privileges Manager) product. For example, when allowing a user to use their computer with Standard user privileges, it does not grant Admin privileges specific only to the Xcode application. The temporary Admin privilege offered by SAP Privileges only introduces a time-based limitation.
How Can I Use It?
You can download SAP Privileges from SAP‘s GitHub page. Or, if you use an MDM, it is available in the application library of many MDM products. You can obtain it via Auto Apps for Kandji and from the Jamf App Catalog for Jamf Pro.
When you send the Privileges application to your users via MDM, if your users are Standard users, they can grant themselves temporary Admin privileges by running the Privileges application. The default setting is set to 20 minutes, and you can find out whether it is active and how many minutes of privilege you have left from its icon on the Dock.

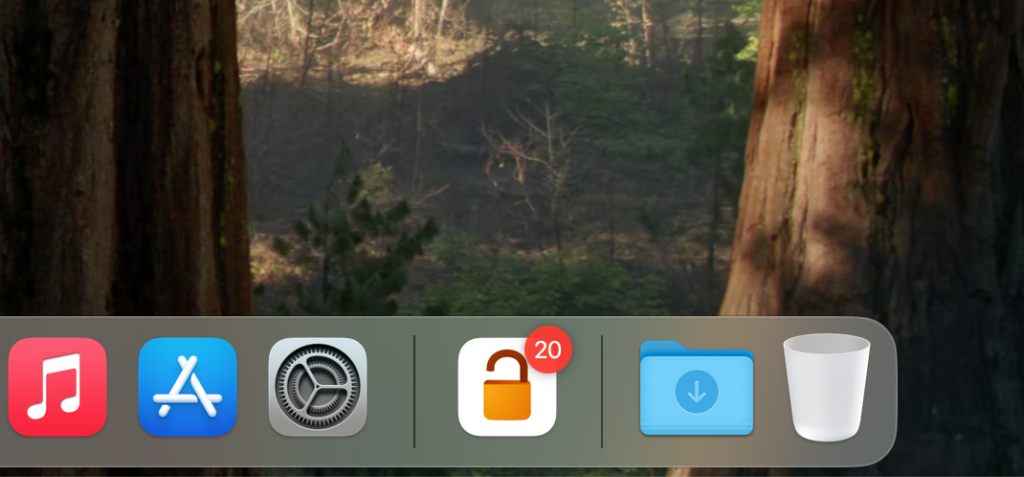
The problem here is that a Standard user can use it as much as they want and use their computer with infinite Admin privileges. If you want to grant Admin privileges only to a specific user group in your company except for some exceptional cases, and keep everyone else as Standard, you should prevent the Privileges application from being used outside its purpose. For this, you can edit the preferences file for the SAP Privileges application and send this file to your users via MDM as well. This way, the application starts working within the settings you have determined, and the user cannot change these settings.
Let’s Get Acquainted with .plist Files
In the macOS operating system, the preferences of applications are kept in a separate file, and unless the developer has made a special choice in this regard, the file extension is .plist. Property List files contain all the modifiable keys of the application, and you can shape these according to your wishes.
Below, you see a portion of the .plist file containing Dock preferences as an example. The areas I marked in green on the code show that the Dock’s magnification feature is enabled. The orange-colored areas are used to determine the Dock’s position on the screen.
<?xml version="1.0" encoding="UTF-8"?>
<!DOCTYPE plist PUBLIC "-//Apple//DTD PLIST 1.0//EN" "http://www.apple.com/DTDs/PropertyList-1.0.dtd">
<plist version="1.0">
<dict>
	<key>largesize</key>
	<real>104</real>
	<key>last-analytics-stamp</key>
	<array>
		<real>774854401.09632897</real>
	</array>
	<key>loc</key>
	<string>en_US:TR</string>
	<key>magnification</key>
	<true/>
	<key>mod-count</key>
	<integer>167</integer>
	<key>orientation</key>
	<string>bottom</string>
	<key>persistent-apps</key>
	<array>
A similar file exists for SAP Privileges and for almost all applications. The .plist file of the SAP Privileges application is located with the name corp.sap.privileges.plist inside the Preferences folder within your Home Library folder. If you look at the contents of this .plist file, you can see that there are different manageable keys. The line marked in red here shows how many times a user can use the Privileges application. The green line shows how many minutes of privilege will be granted each time Admin privileges are obtained.
<?xml version="1.0" encoding="UTF-8"?>
<!DOCTYPE plist PUBLIC "-//Apple//DTD PLIST 1.0//EN" "http://www.apple.com/DTDs/PropertyList-1.0.dtd">
<plist version="1.0">
<dict>
	<key>ExpirationInterval</key>
	<integer>5</integer>
	<key>ExpirationIntervalMax</key>
	<integer>3</integer>
	<key>PayloadUUID</key>
	<string>5F5ADB81-A85F-4AD9-8416-A6727F40C222</string>
	<key>ReasonMaxLength</key>
	<integer>50</integer>
	<key>ReasonMinLength</key>
	<integer>2</integer>
	<key>ReasonRequired</key>
	<true/>
</dict>
</plist>
So How Do We Edit This .plist File?
You can prepare it in plain text format with any text editor, first save it as .txt, and then change the file extension to .plist. But instead of dealing with this, you can get help from third-party software that can prepare MDM configuration profiles. Like iMazing Profile Editor… If you want to prepare a profile file that can be used within the scope of Apple’s MDM Protocol, you can simply do this with Apple Configurator for Mac as well. But tools like iMazing Profile Creator do not just configure the payloads in Apple’s MDM schema — they also allow you to change the settings of many third-party software and save them as configuration profiles. You can download the iMazing Profile Editor application from this address.
When you open the iMazing Profile Editor application for the first time, you can start by giving the Profile file you will create a name from the General section that appears. For example, something like “SAP Privileges”
If the name you see in the Identifier section begins with your own computer’s Local Hostname, I recommend changing it here. You will prevent any confusion that may arise with other configuration profiles you will create with iMazing Profile Editor in the future. Here you can give a name in reverse DNS structure. Like “com.mdmhow.kandji.sapprivilegessettings”… You will have specified your organization’s name, the name of the MDM solution you use, and the purpose of the profile.

After filling in these two fields, you can reach the payload where you can control SAP Privileges by clicking the search box at the top right of the screen and typing SAP. By clicking the + Add Payload button, you can add the SAP Privileges settings to the settings of the profile you are creating.
Before moving on to the SAP Privileges settings, let me also share this simple information. Technically, you could actually prepare a single configuration profile and deliver every detail you want to manage on user devices with a single profile. This way, a single profile file goes from the MDM server to the user’s computer and does all the work it needs to do. But in real-life scenarios, this is not a sustainable approach. Because if, for example, you save the settings of the SAP Privileges application together with a Restriction as a single configuration profile, you will have to send these two payloads together. You cannot say let the people working in the marketing department receive the Restriction payload, and let Human Resources not receive the Restriction, only receive the SAP Privileges settings.
For this reason, the best practice is to save each profile file separately and send them separately.
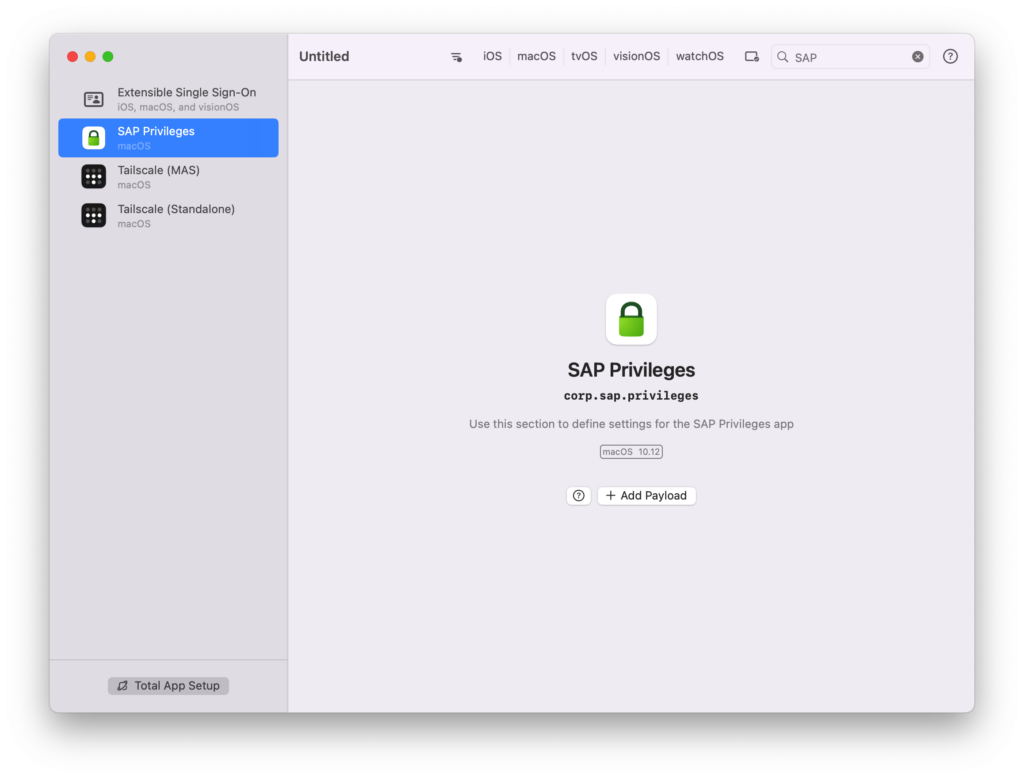
When you check out the SAP Privileges settings, you can see all the controllable keys. I want to explain a few points I find important here.
Expiration Interval: Shows how many minutes the user can use the Admin privilege. You can enter a value greater than zero. It would be appropriate to determine a duration here considering the operations users might want to perform with Admin privileges. If you set super short durations like 2-3 minutes, your users will probably have used up the time before they can perform any operation.
Expiration Interval Max: Used to determine how many times a user can obtain Admin privileges during the day. You can enter a value like 3 here, for example.
Allow CLI Biometric Authentication: The easiest way for users to request Admin privileges is to use the Privileges application. However, they can also obtain Admin privileges through the CLI (Command Line Interface). For this, it is sufficient for them to enter the PrivilegesCLI –add command using Terminal. The Allow CLI Biometric Authentication command requires a user requesting Admin privileges via CLI to perform a biometric verification similar to Touch ID or Face ID before this privilege is granted.
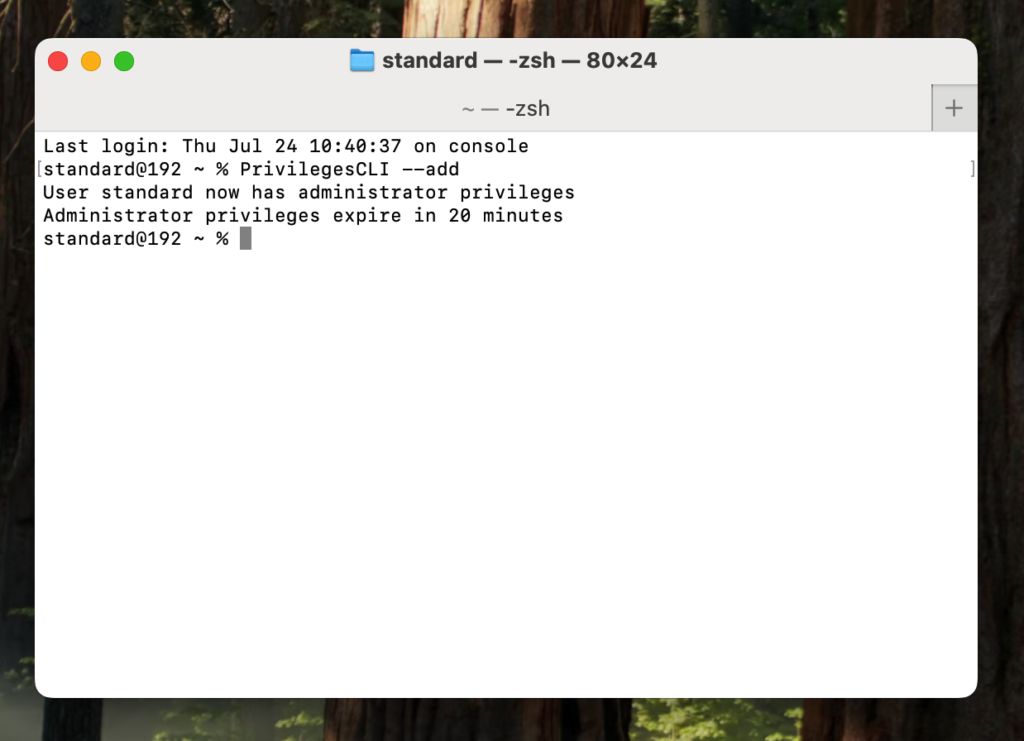
Require User Authentication: Requires a user verification just like the Allow CLI Biometric Authentication command. But this time, for requests coming through the graphical interface rather than through the CLI.
Reason Required: Makes it mandatory for the user to state why they will use this privilege before requesting Admin privileges. From the Reason Maximum Length section just below it, you can determine the length of the short description they will write. You can add a limit like 100 characters. If you want the user to use one of the pre-prepared options when stating a reason, you can determine these options from the Reason Preset List section.

After making these and the other settings I have not written here, you must save it by issuing the File > Save command from iMazing Profile Editor. You can upload the .mobileconfig document you obtain to the MDM solution you use and send it to your users along with the SAP Privileges application.
When the settings are loaded via an MDM configuration profile, you take away the end user’s right to make changes to the Privileges application’s settings. This way, they cannot add time as they wish.

TL;DR
Let me give a quick summary:
• Some users who use their computers with Standard user privileges may sometimes need Admin privileges
• An application called Privileges, developed by SAP, is used so they can obtain this privilege on their own
• So that users do not grant themselves Admin privileges as much as they want with this application, the application’s settings can also be prepared centrally and sent to users.
• A third-party tool called iMazing Profile Editor can be used to do these things.
Photo by Daiji Umemoto on Unsplash
Leave a Reply