

When you experience some problems on the Apple device you use, you may need to obtain diagnostic data to get to the root of these problems and gain in-depth information about your device. We can liken this diagnostic data to the tests that the doctors we go to for our health ask us to have done. For example, when you only go to an internist, that doctor may request some blood tests. But these tests do not cover, say, an MRI scan. By entering a check-up service at a full-fledged hospital, you can obtain information about your entire health from head to toe. Aha, Sysdiagnose is exactly the Apple version of this…
When you take a Sysdiagnose report, this report collects status information about many different points of the system and makes it into a single package. So why do we need Sysdiagnose reports? You may be experiencing a problem with the Apple device you use or with your MDM solution. And you can request support from the vendor/Apple about this. The support specialists across from you may ask you to create a sysdiagnose report so that they can view the current state of the device experiencing the problem, and to share this with them. With the report you send, they can gain multifaceted information about the computer or iPhone experiencing the problem.
I say ‘report’ when talking about Sysdiagnose, but don’t let a single TXT or PDF document come to your mind. A sample sysdiagnose report looks like this.
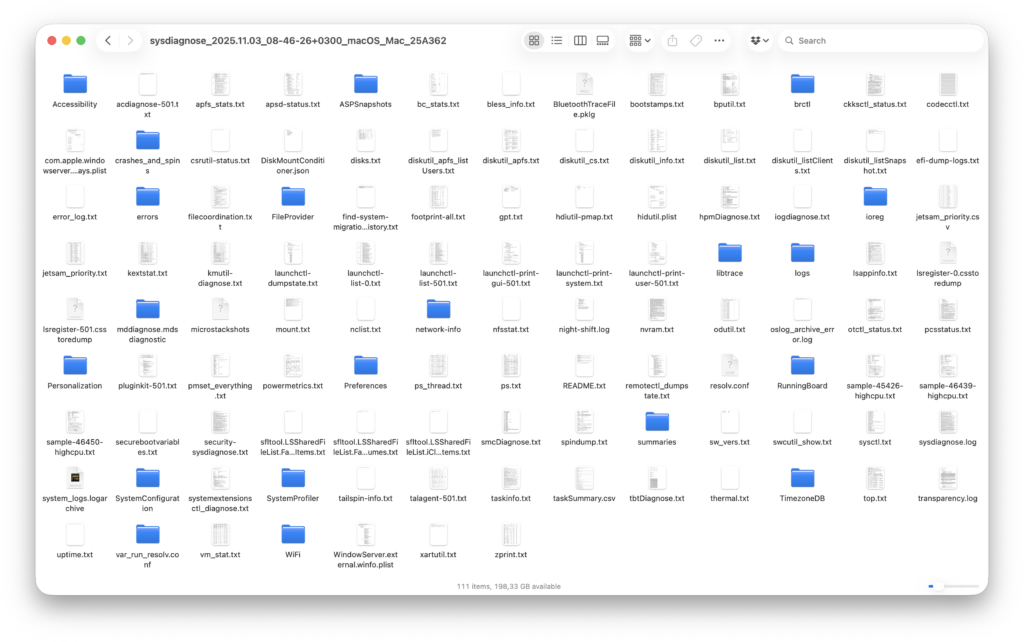
Before you create the Sysdiagnose report, your system will warn you about privacy. Because it actually collects certain data about your device’s hardware components, peripherals, your operating system, your applications, your mail address, and your usage habits. This information does not include personal information such as your web browser history, for example. But you should still be careful about whom and how you share it with.

Getting a sysdiagnose Report from a Mac
Unlike other mobile devices, there is more than one method for getting a sysdiagnose report from Macs. To be able to apply any of these methods, you need to have Admin privileges on the device. When standard users want to get this report, the system will ask for the Admin user’s password.
If you like, let’s start with the easiest of these methods.
Finder shortcut
While on the desktop — that is, while no other application is in the foreground — press the Command + Option + Control + Shift + Period key combination on your keyboard.

When you press these keys at the same time, you will see a momentary flash on the screen. Within a few minutes, your report will be saved under the Macintosh HD/private/var/tmp folder in compressed .tar.gz format. When the report is ready, it opens this folder directly in front of you. But if you want to reach that address again later, you can use the Go > Go to Folder command from Finder and type /private/var/tmp.
Activity Monitor
With Activity Monitor, the task manager on our Macs, we can see how much system resource all the applications we use or that run in the background consume. When necessary, we can end any application or task via Activity Monitor. If you’ve never used it before, Activity Monitor is in the Macintosh HD/Applications/Utilities folder.
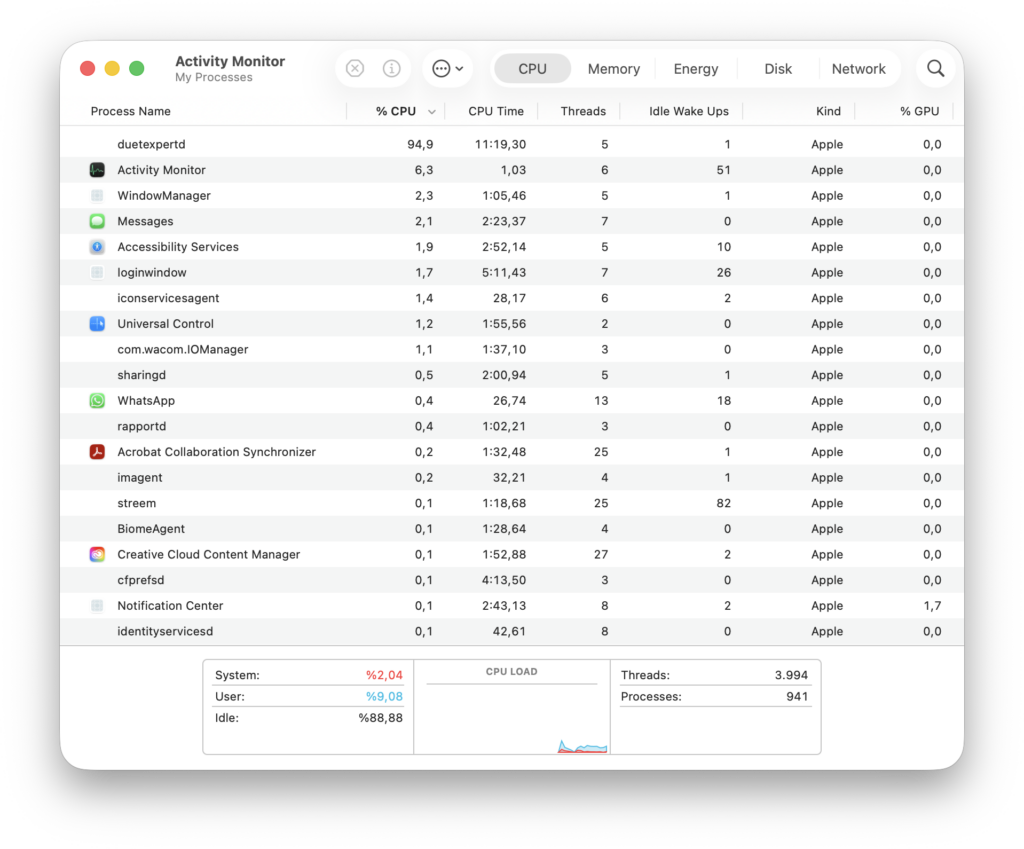
With Activity Monitor, the task manager on our Macs, we can see how much system resource all the applications we use or that run in the background consume. When necessary, we can end any application or task via Activity Monitor. If you’ve never used it before, Activity Monitor is in the Macintosh HD/Applications/Utilities folder.
Terminal
You can also get Sysdiagnose reports via Terminal. For this, it’s enough to open the Terminal application and type the following.
sudo sysdiagnoseBecause it begins with sudo, it will automatically ask for the Admin password on the next line. Right after that, following an informational message about privacy, it begins to create the report. The created report will again be saved under the Macintosh HD/private/var/tmp folder.

Getting a sysdiagnose Report from an iPhone
When you need to get a sysdiagnose report from your iPhone, you can do this by pressing a few buttons together. To create the report, you must press the volume-up, volume-down, and power buttons at the same time for 1 second. As a result of this, you may feel a short vibration. If you press a bit long, you will reach the Emergency SOS / power-off screen. If you saw that screen, it means you couldn’t do it. Try again.

A few minutes after pressing these buttons, your sysdiagnose report is ready. If you go to the Settings / Privacy & Security / Analytics & Improvements / Analytics Data address on your iPhone, you can reach your sysdiagnose report by scrolling to the letter S within the long list that appears. Because the created report is again in a compression format like tar.gz, its content is not directly visible. You can save the report to the Files application or send it to your computer with AirDrop.

Getting a sysdiagnose Report from an iPad
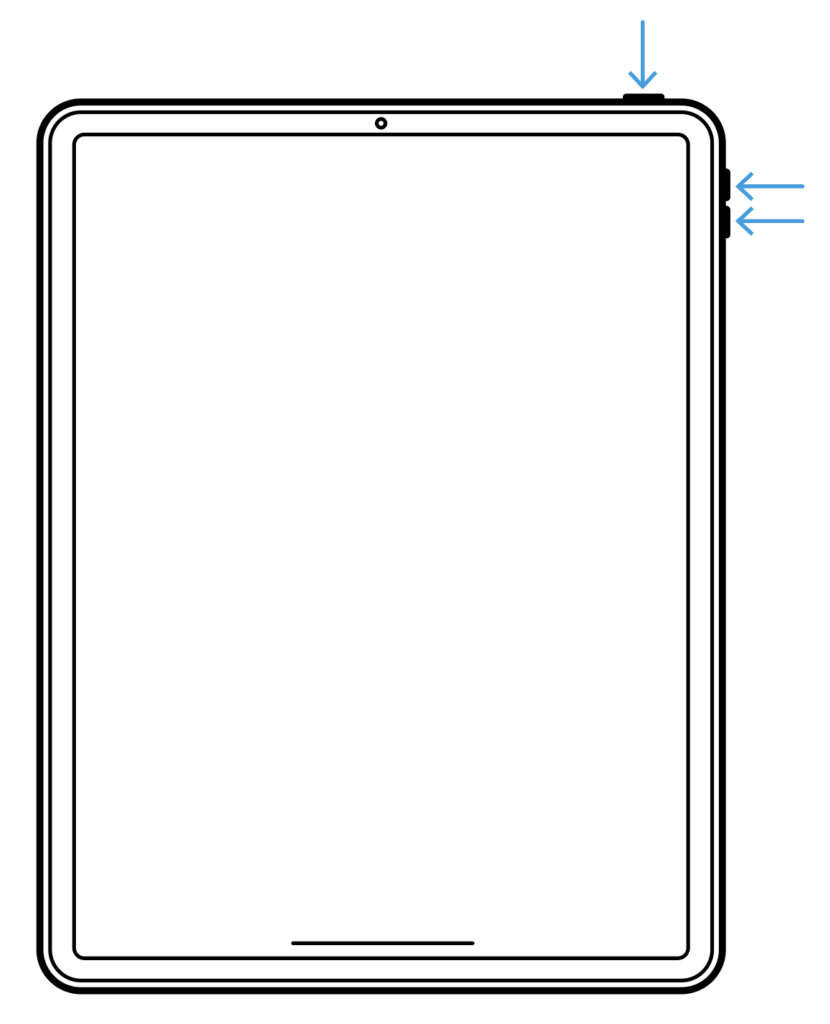
The process of getting a sysdiagnose report from your iPad is very similar to getting one from the iPhone. Again, you need to press a few buttons together. To create the report, you must press the volume-up, volume-down, and power buttons at the same time for 1 second. On iPads, there will not be a vibration like on the iPhone (because there is no Haptic engine). If you press a bit long, you will reach the Emergency SOS / power-off screen. If you saw that screen, it means you couldn’t do it. Try again.
A few minutes after pressing these buttons, your sysdiagnose report is ready. If you go to the Settings / Privacy & Security / Analytics & Improvements / Analytics Data address on your iPad, you can reach your sysdiagnose report by scrolling to the letter S within the long list that appears. Because the created report is again in a compression format like tar.gz, its content is not directly visible. You can save the report to the Files application or send it to your computer with AirDrop.
Here we explained Mac, iPhone, and iPad, but you can get Sysdiagnose reports even from the Apple Watch, Apple TV, and even the Apple Vision Pro. You can see the whole list under the sysdiagnose heading at this address.
One Step Further
A taken sysdiagnose report takes up on average around 300 MB of space. And you may not be able to send an e-mail of this size to the counterpart across from you. Rich Trouton, the author of the DerFlounder blog, has prepared a script to solve this problem. This script is used to automatically upload Sysdiagnose reports to Amazon S3. You can read the DerFlounder article here.
Photo by Hush Naidoo Jade Photography on Unsplash
Leave a Reply