
Me: So this thing I just showed you is the zero touch deployment scenario, Mr. Mehmet. Your device, in this way, talks to Apple Business Manager, is directed to the MDM server, and automatically pulls the MDM enrollment profile from there.
Mr. Client: Very nice. But can’t we do this without formatting the computer?
Me: Unfortunately, we can’t. The device only follows this workflow during the initial activation.
Mr. Client: Can’t we do it at all?
Me: Actually, there is a method, but it’ll make you say “I wish I had just formatted the computer.”
The fact that computers being able to automatically pull the enrollment profile from the MDM server by talking to Apple Business Manager — that is, the Automated Device Enrollment method — requires formatting the computer, is the bleeding wound of our industry. Many organizations face this requirement after they start managing their devices with an MDM solution. And they look for ways to escape the operational burden that would be created by, for example, resetting all 150 Macs already in use across the organization at once.
The general consensus is as follows: in the first phase, enroll devices into the MDM by manually installing the enrollment profile and start managing them. This method, which Apple calls Profile Based Device Enrollment, does not make a big difference in terms of managing Macs. On iPhones and iPads, profile-based manual MDM enrollment is no longer even an option.
In the second phase, continue by enrolling users whose computers will be replaced for any reason into ABM piece by piece with the Automated Device Enrollment method. There are many advantages that come with the device being able to enroll into the MDM automatically. For this reason, even though we have invented temporary solutions in the meantime, it is very important that, as the ultimate goal, all devices are registered in ABM and assigned to the MDM from there.
As the title of this article also says, it is possible to enroll our devices into Apple Business Manager without resetting them, without touching user data. This operation requires a certain amount of effort and time. For this reason, it is not a sensible solution to apply to an entire fleet of 150 devices. But it can be used for special cases.
This method is based on the article titled “Add a Mac Computer to Apple Business Manager or Apple School Manager Without Erasing it First,” published by the American Apple consultancy firm HCS. You can download the original article at this address.
This operation roughly consists of 4 steps:
1. Creating a temporary disk partition on the computer
2. Starting the computer from the Recovery Partition
3. Installing a new macOS on the newly created partition
4. Enrolling into ABM with Apple Configurator while the computer is booting from the macOS on the new partition
Step by Step
Now let’s do these operations together, step by step.
1. Disk Utility
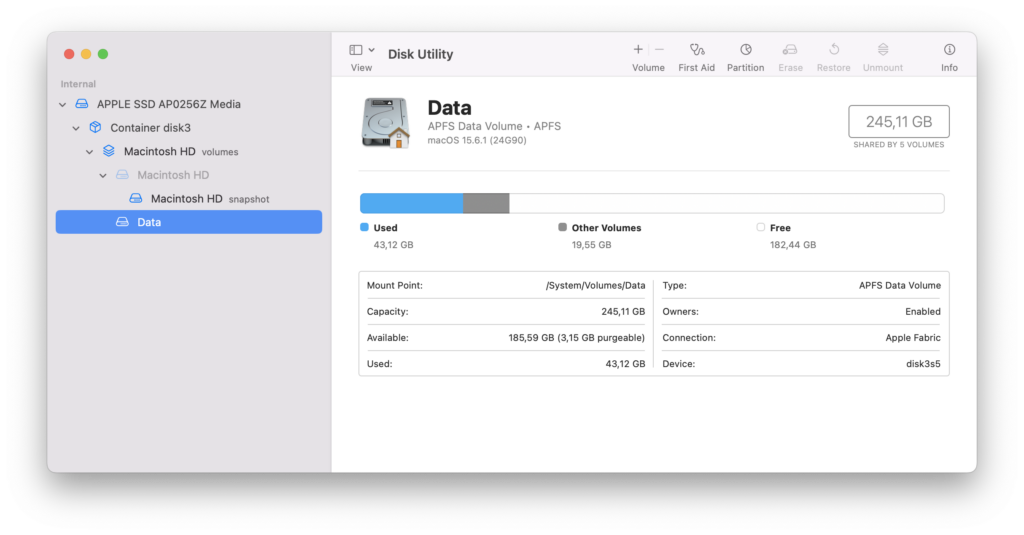
Let’s start by first opening the application called Disk Utility located in the Macintosh HD / Applications / Utilities folder. Disk Utility is software we use to manage our computer’s internal or external disks.
When Disk Utility opens, we need to select the Data option from the disk list on the left side, and then click the Partition icon at the top of the window.
2. Partition
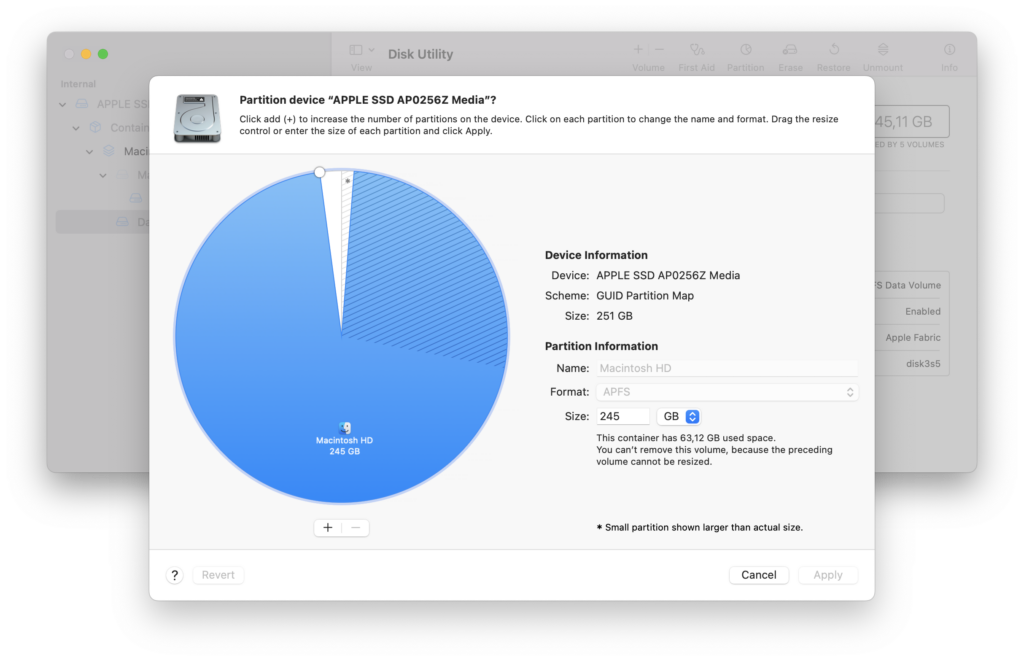
When you click the Partition button, a screen showing your disk’s structure opens. Add a new Partition by clicking the + icon located just below the large circle shape you see on the screen. When you click the + button, a warning window opens. There are two options named Add Partition and Add Volume. You will choose Add Partition.
3. İsim, Büyüklük ve Format
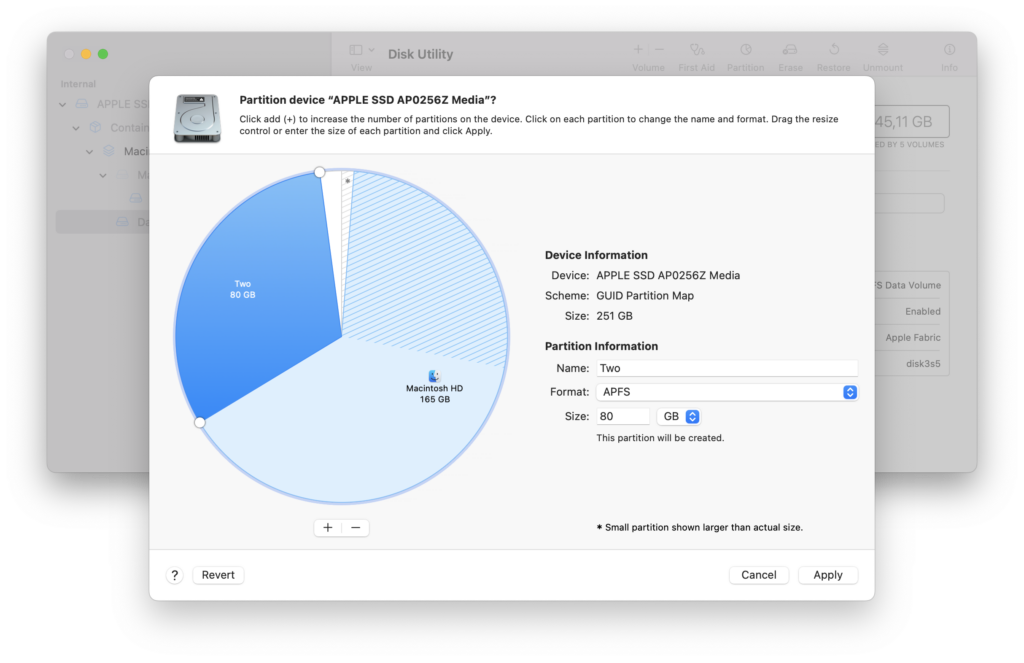
When you issue the Add Partition command, a new Partition is created. From the window’s Partition Information section, you can give this partition a name, choose the disk format, and adjust its size. Since we will install macOS on this new Partition we are creating, it is beneficial to keep the disk format as APFS. After adjusting your variables, you can click the Apply button in the bottom-right corner of the window. A second warning screen will appear. On that one too, click the Partition option.
Right afterward, a second warning appears, giving a warning that creating a Partition will make the computer unusable for a while. On that one too, continue by clicking the Continue button.
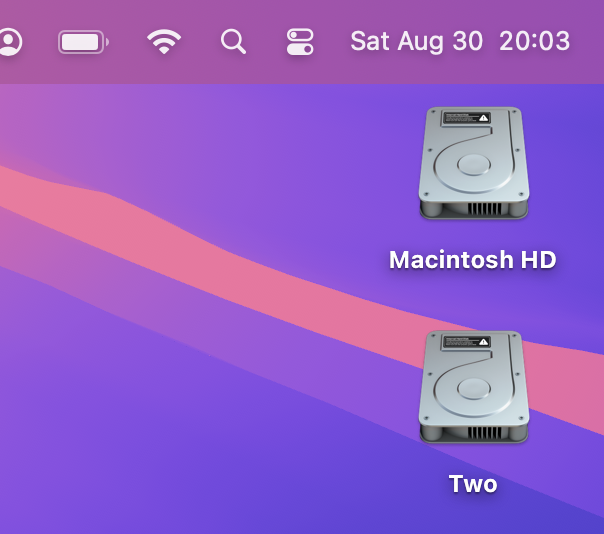
When the operation is complete, your second disk will appear on your desktop. If your disks are not visible, open the Settings option from the Finder menu and enable the Hard Disks option from the General tab. This option is not active in the standard installation of macOS.
4. Recovery Partition
Now we need to shut down our computer and start it from the Recovery Partition. For this, issue the Shut Down command from the menu. To turn the computer back on, hold your finger down while pressing the Power key and don’t lift your finger until you see the text Loading Startup Options. A screen with two separate options named Macintosh HD and Options will appear. You can reach the Recovery Partition by clicking the Options option.
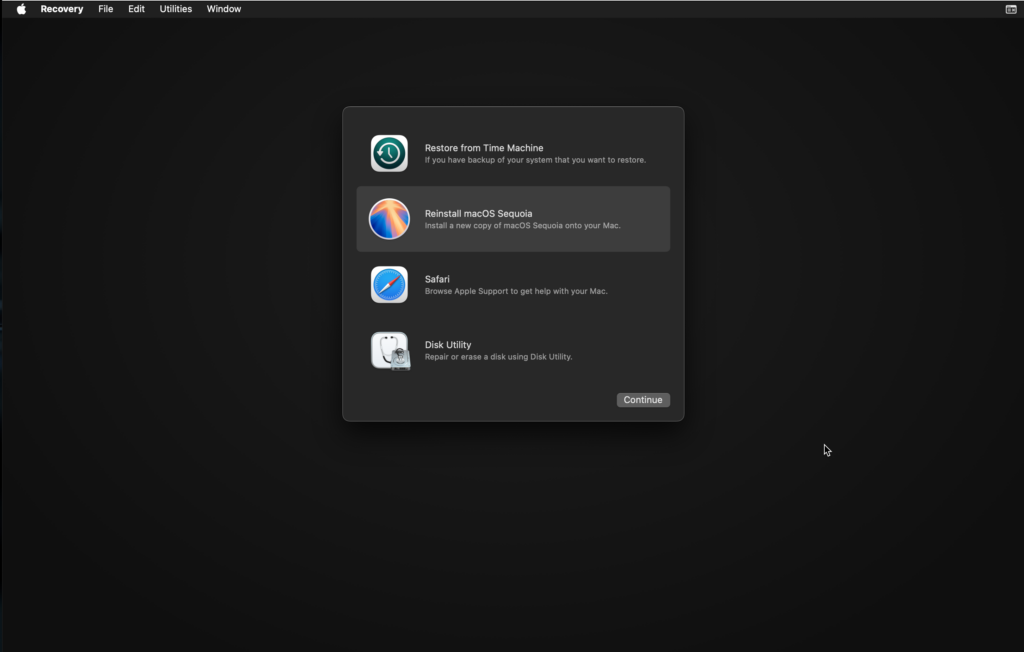
Alternative Method: If you have a macOS Sequoia installer application previously downloaded from the App Store, you don’t have to start your computer from the Recovery Partition. You can install by directly running the Installer application and pointing to the new Partition you created as the target disk. The advantage of using the Recovery Partition is that it also automatically downloads the macOS Sequoia to be installed.
5. Installing macOS
You can start the operating system installation by selecting the Reinstall macOS Sequoia option from the Recovery screen. The installer will first get the end-user license agreement approval, and then have you select the disk to install on. At this step, you can select the Partition you created yourself.
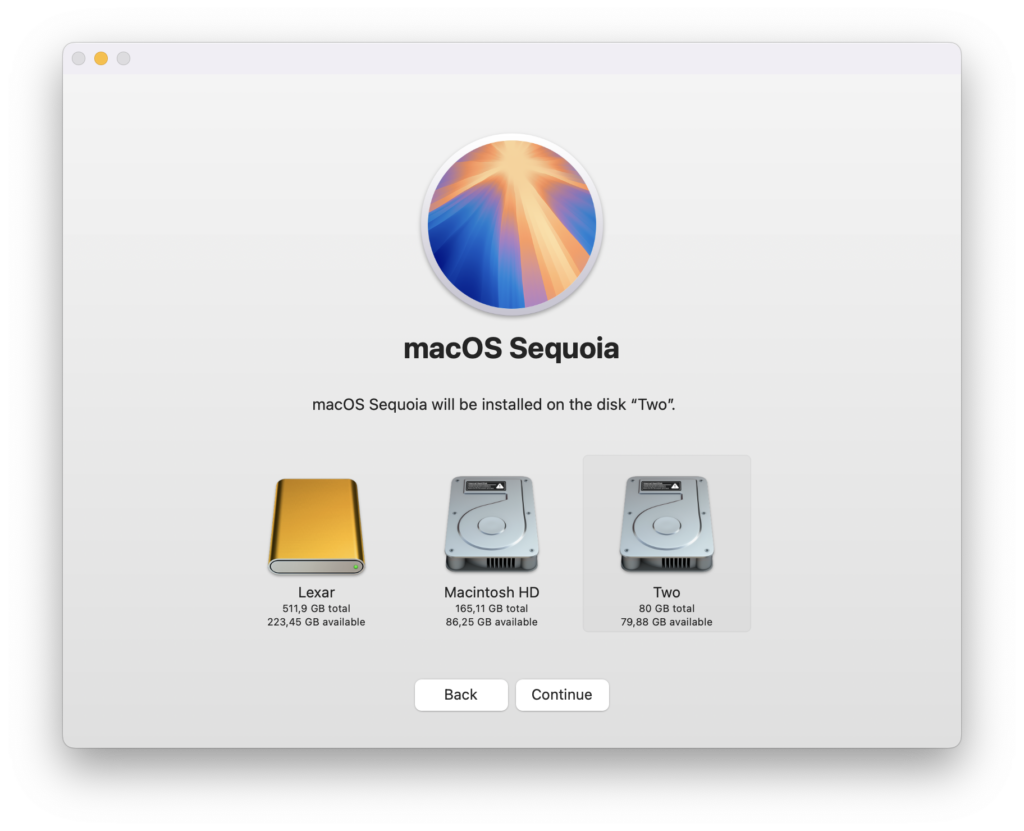
When you select the disk and press the Continue button, it will download and install the most current version of macOS Sequoia from Apple’s servers, and then restart. At this point, let me remind you of this: when the computer restarts, it boots with the macOS installed on the new Partition you created.
6. Apple Configurator
The rest of the article is the same as our previously published article, Adding a Mac to Apple Business Manager.
- Download the Apple Configurator application to the iPhone you will use to add the devices.
- On first entry to the application, it will request access to the camera and to finding Bluetooth devices. Grant these permissions.
- Then it asks you to enter the account of an Administrator or Device Manager authorized user in Apple Business Manager. Enter this account’s email address and password and click the Continue button.
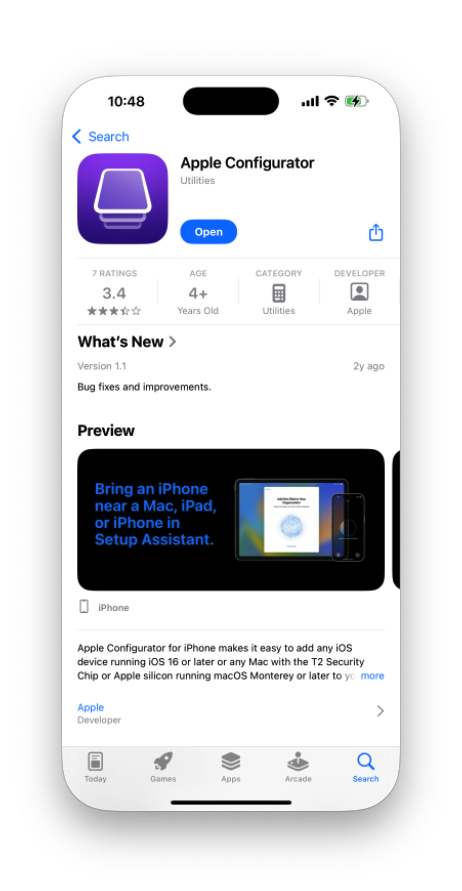
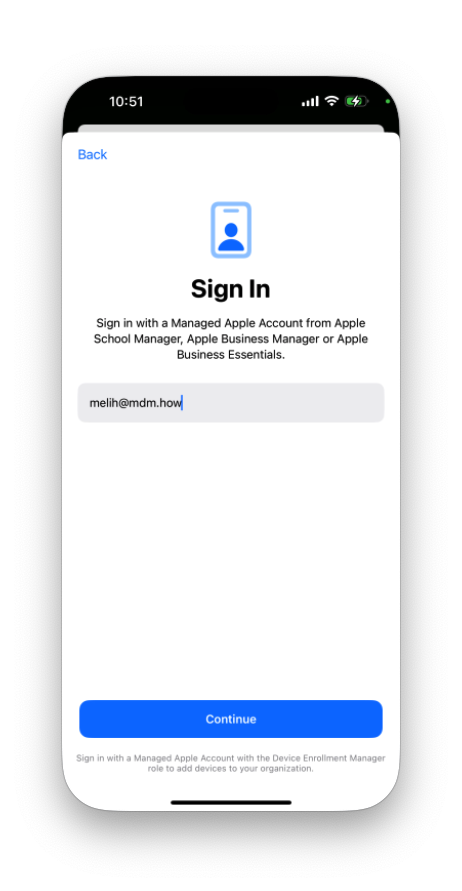
- After logging in, the Apple Configurator settings screen appears. The most important point you need to pay attention to here should be Wi-Fi sharing. The device you will enroll into ABM must have internet access during the first startup. You can provide this in two ways: either by sharing the internet of the iPhone you use to add it, or by preparing a configuration profile containing Wi-Fi access information. If the iPhone you will use to add it is connected to a Wi-Fi network restricted by various Firewall rules, you may need a third device that can share internet for this operation. This device can be, for example, another iPhone or Android device, or any device that can provide mobile data, like a Superbox.
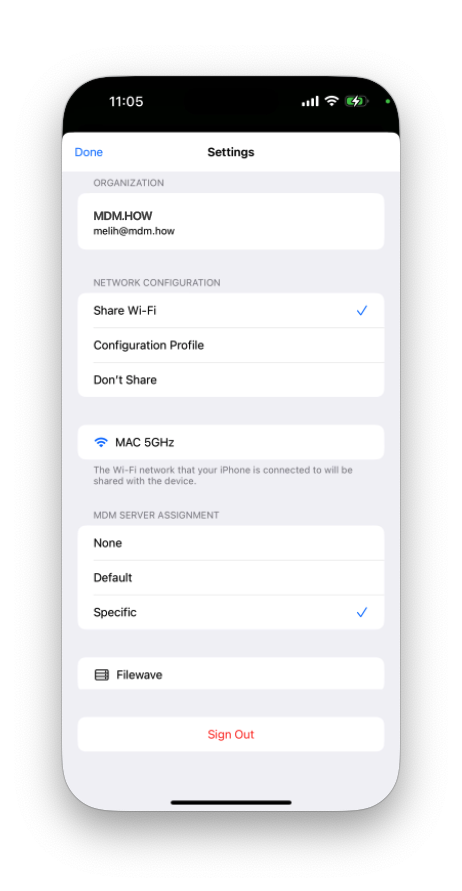
- On the Apple Configurator Settings screen, you can make the Share Wi-Fi selection under the Network Configuration heading.
- From the MDM Server Assignment section, if you have some MDM servers you previously added to ABM, you can select your MDM server by choosing the Specific option so that the device is automatically assigned to one of them. Making this selection is not mandatory. You can also leave it as None. After the device is added to ABM, you can also make this assignment from within ABM.
- After making your preferences on the Settings screen, when you press the Done button, a camera screen with a circular area marked in the middle opens.
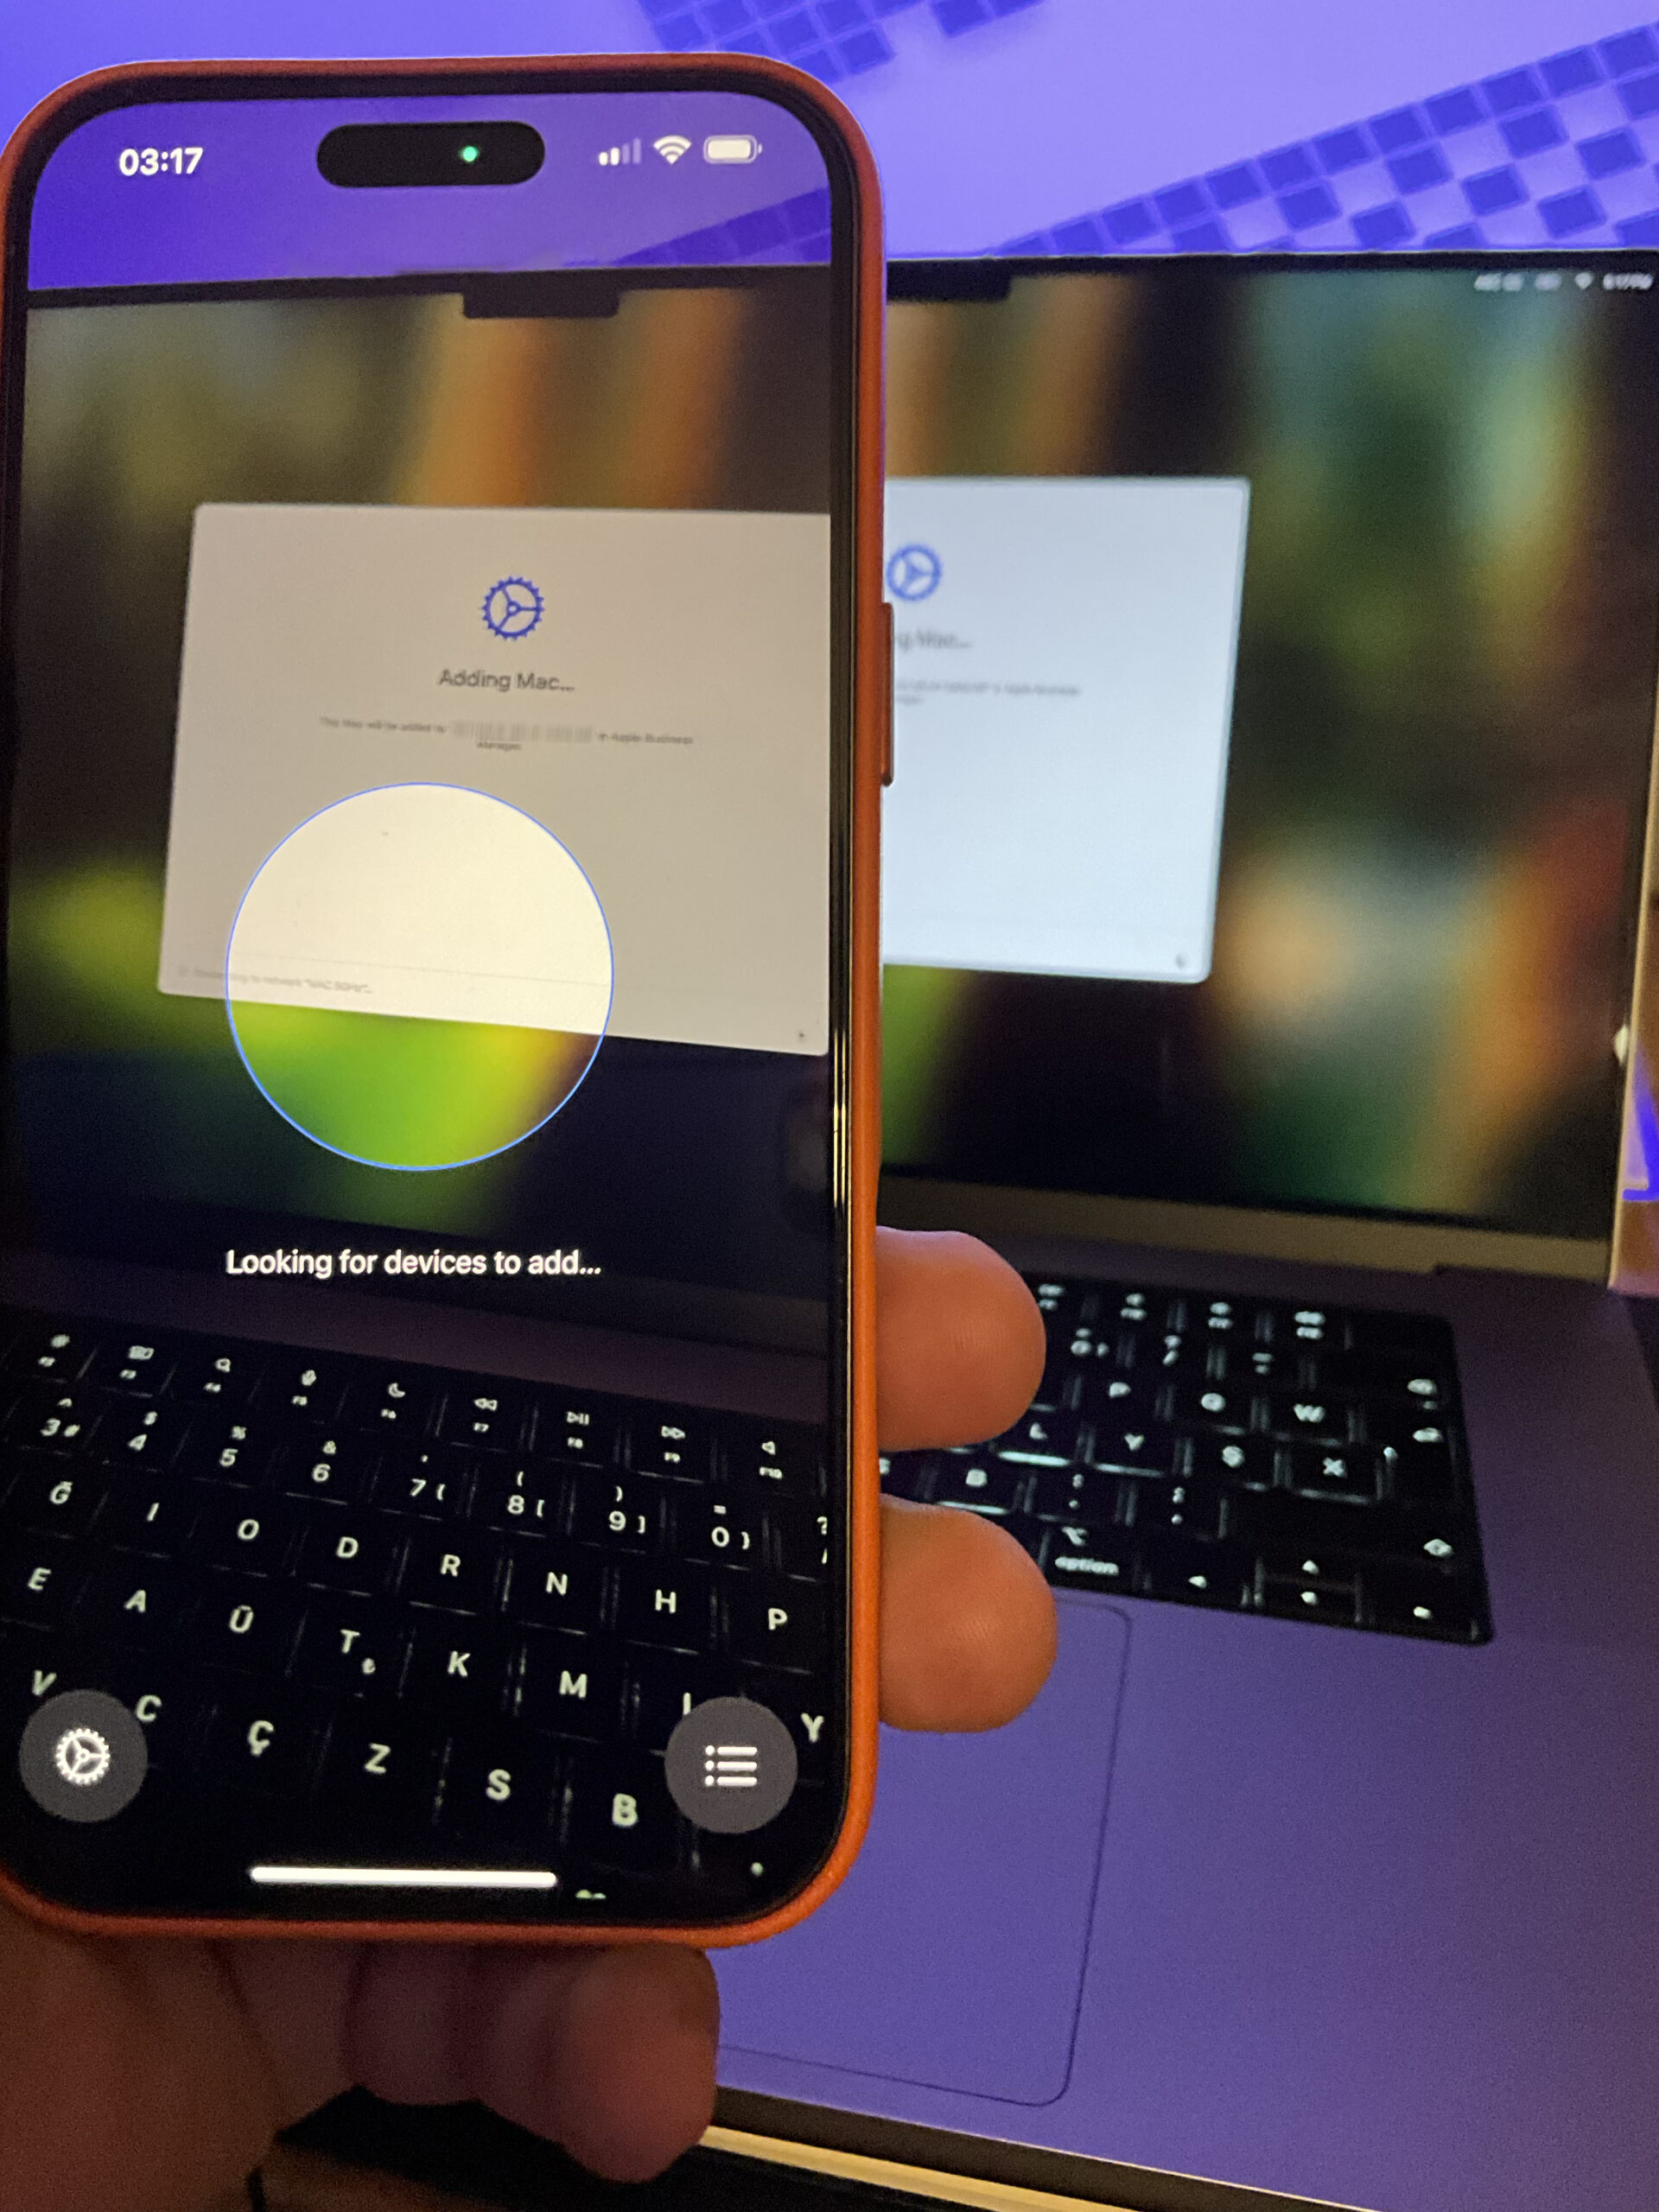
- From this point on, you need to continue on the device you will add to ABM. If the device you will add is in a reset state and you see the word Hello in different languages on the screen, you can proceed through the setup steps on the Mac. You should proceed until the Mac reaches the Country Selection screen.
- When you reach the Wi-Fi selection screen, instead of selecting any network, when you bring the Configurator-loaded iPhone close, a visual code appears that you can scan into the circular area on the iPhone’s screen. The moment you scan it, a screen reading “Adding Mac” appears. And right afterward, within a few seconds, you see the text “Mac Added”.
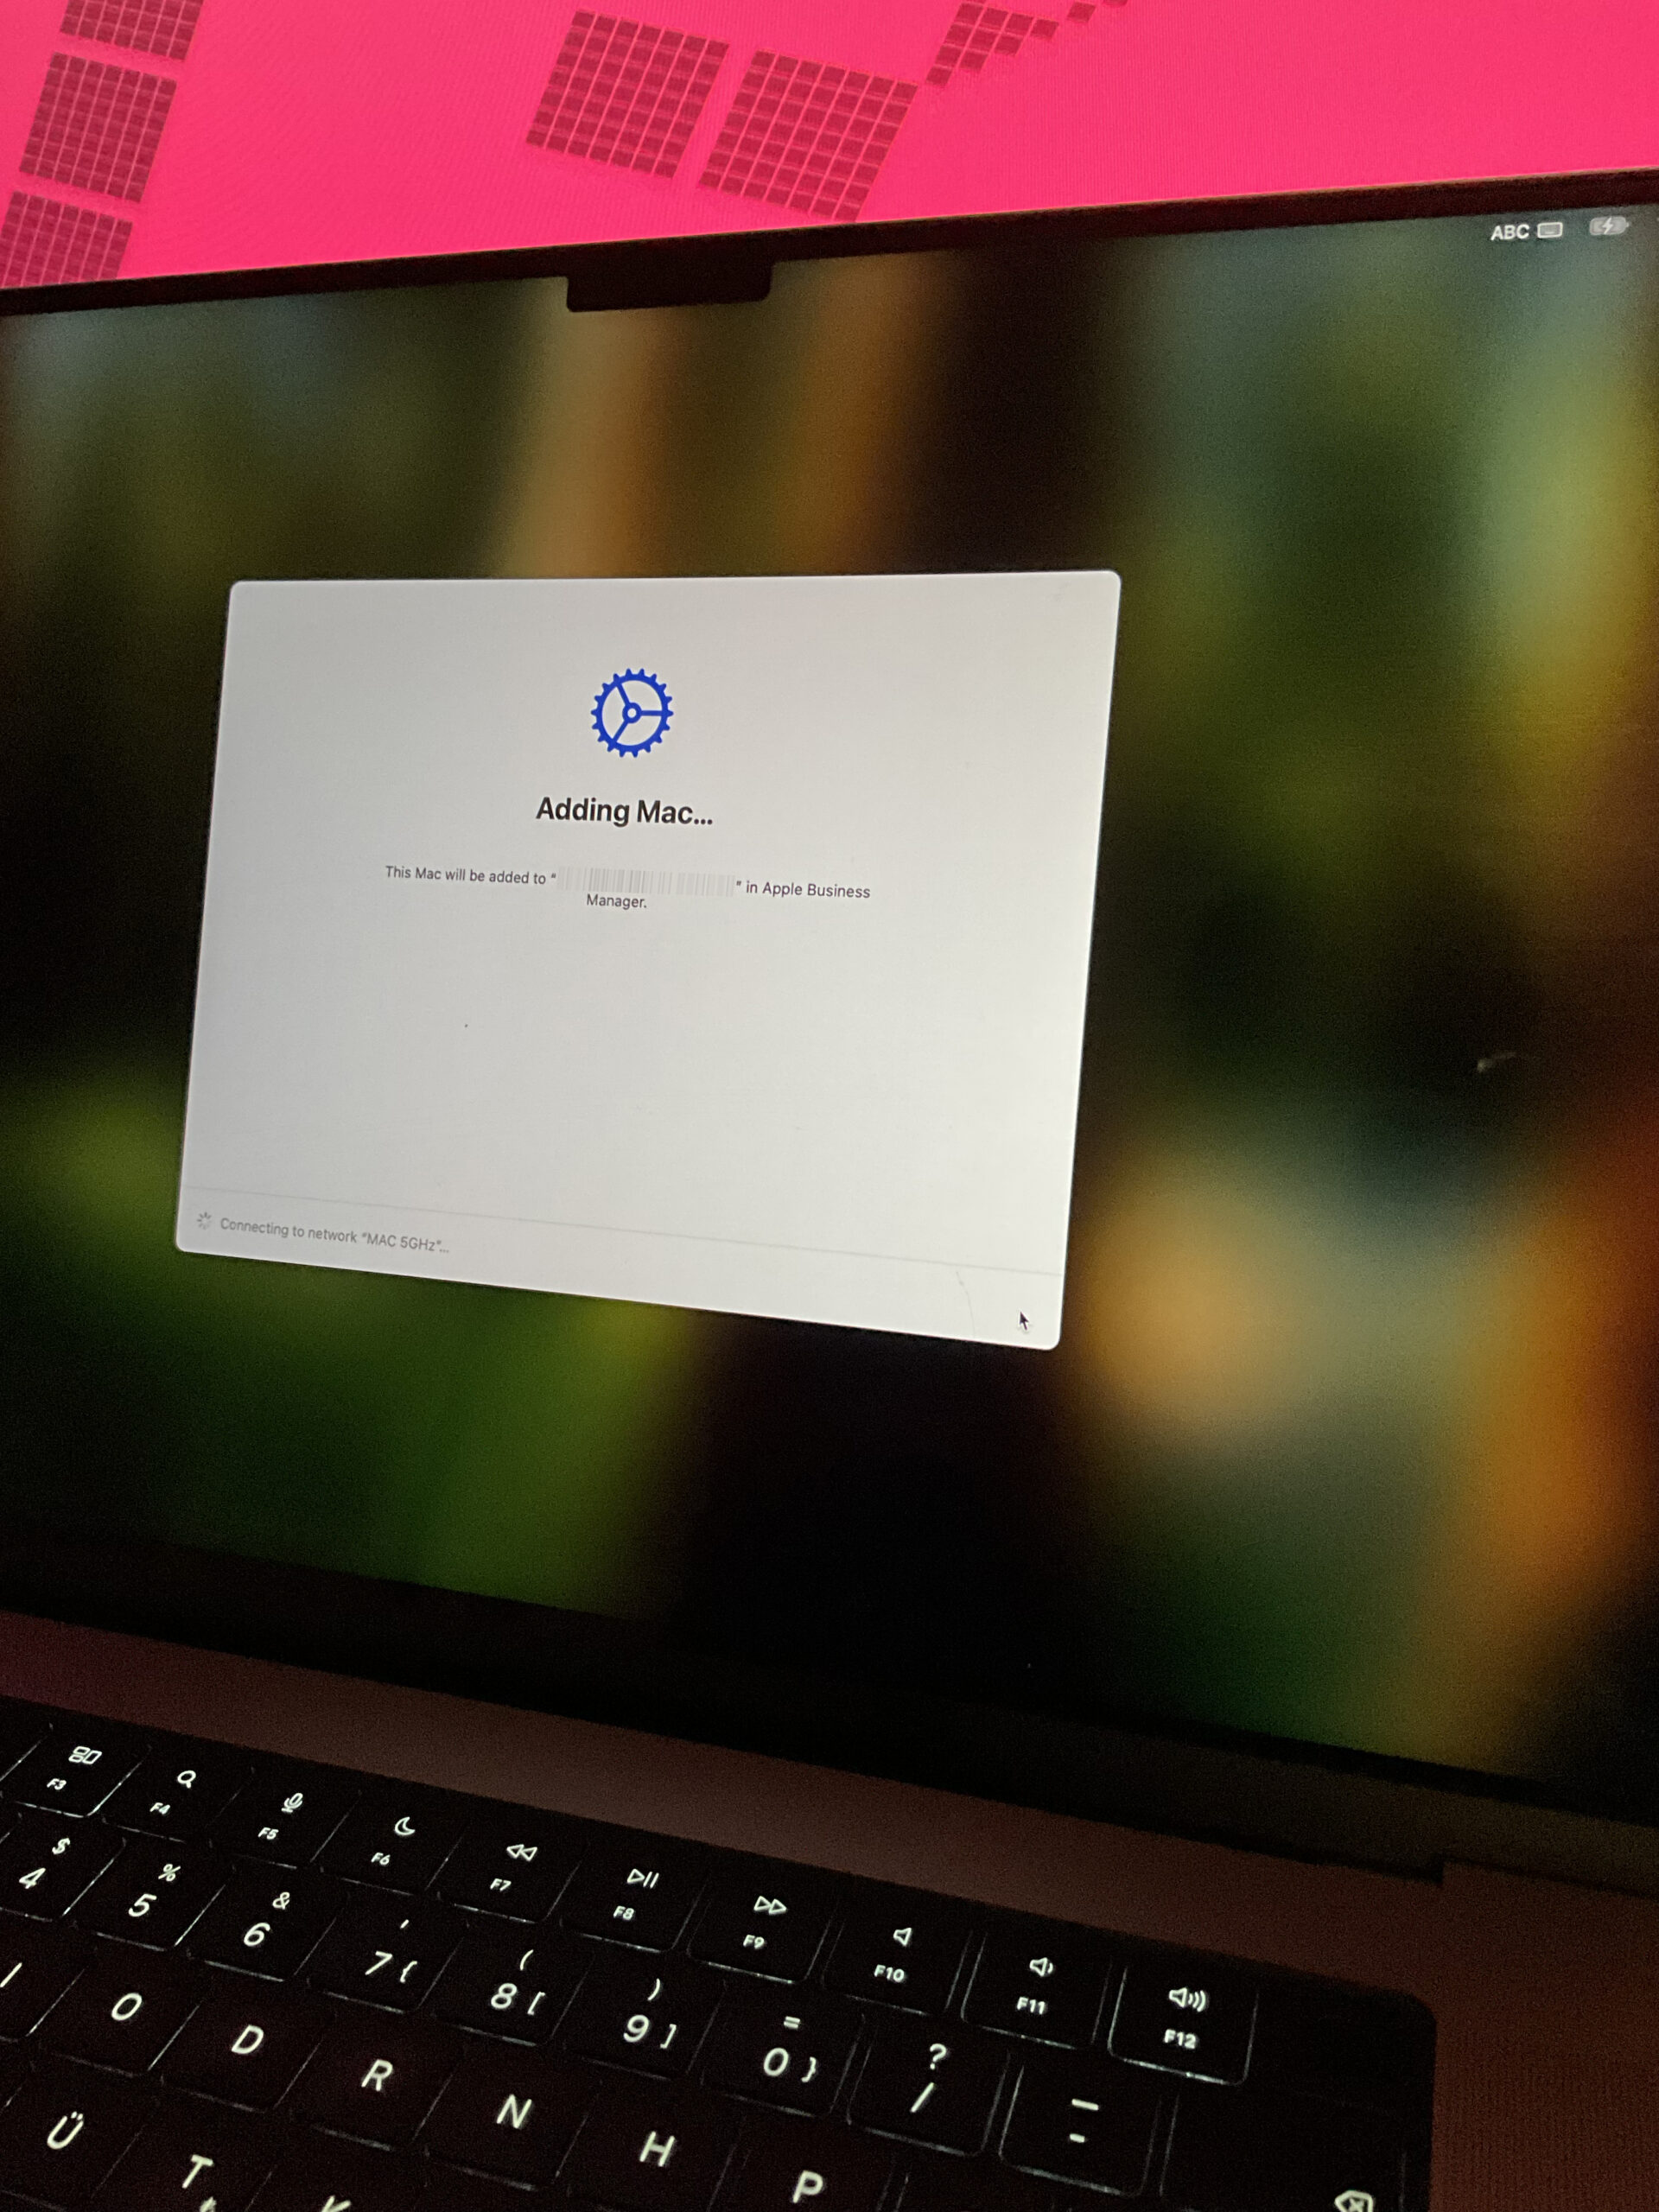
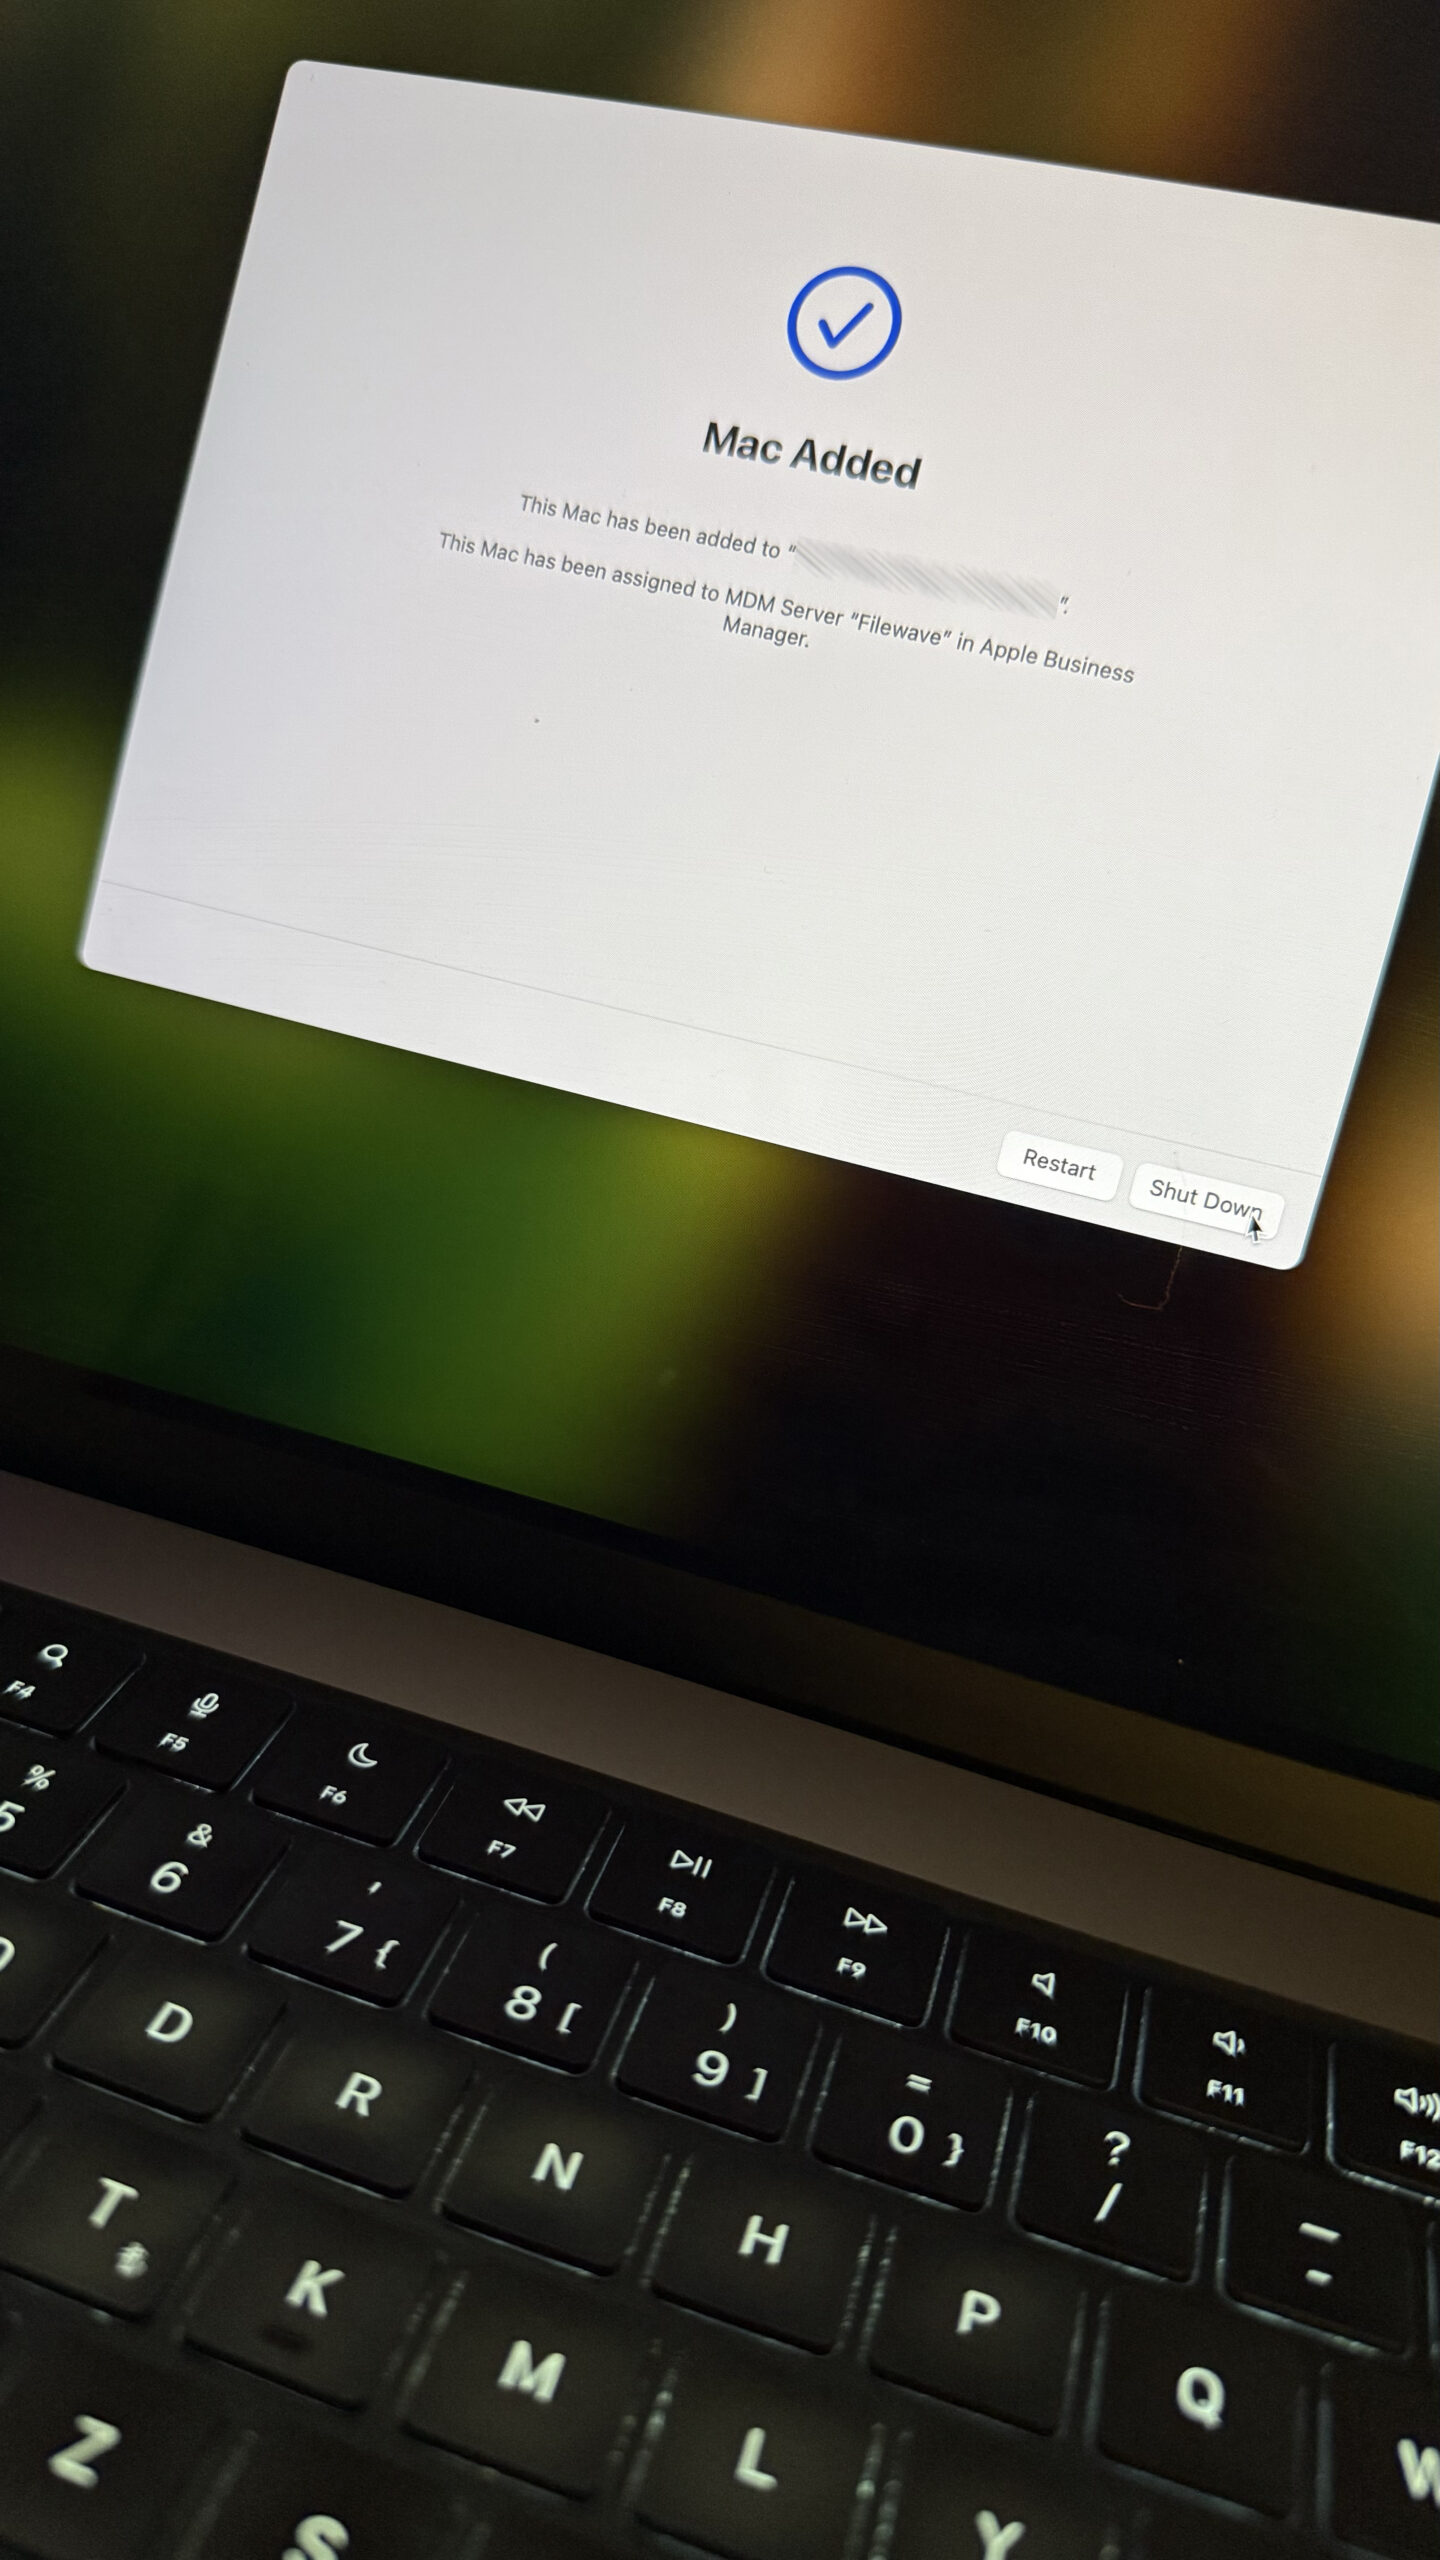
- If it waits a bit too long on the Adding Mac screen and then does not finish the operation, the problem most likely stems from internet access.
- After this operation is finished, you can continue setting up the Mac by clicking the Erase Mac button. If you want your computer to continue being set up within the framework of the settings determined by the MDM server, instead of continuing by resetting the device, you should first make the necessary settings from the MDM server, assign them to this device, and then reset it. This way, when the device restarts, it will start not like an end-user device, but like a device managed by the MDM server.
- You can see your device added to ABM by going into Apple Business Manager and from the Devices section, and if you wish, you can remove or change the MDM assignment.
Photo by Nikita Kachanovsky on Unsplash
Leave a Reply