

I’m guessing you won’t ask “What even is a Passkey?” Because as you know, many online services that we log in to by creating an account now require newer-generation verification methods. Like an SMS sent to a phone number, a notification sent to an iPhone, Authenticator applications, and similar methods. Passkey is one of these. By now, I’m sure that you too have created a Passkey at least once. But still, if you’d like to quickly try out the process of creating a Passkey again, there’s a service where you can do this: Passkeys.io

Phishing methods are constantly diversifying, and authentication methods have to be resistant to this. We live in an era where users’ passwords can be easily obtained, sometimes with brute-force attacks and sometimes with social engineering methods. For this reason, the login methods we use when accessing services need to be secure first and foremost. But not just secure on their own — they also need to be as simple as possible for the user.
Passkeys use the WebAuthn API and make use of the biometric data on the user’s device (such as Touch ID, Face ID) for access to any service requiring verification. A standard Public Key – Private Key key pair is used. The Private Key stays private and is not transmitted to the other side. Only the Public Key is transmitted to the service/server side to be accessed. Therefore, even if one day a website you use has its entire database stolen, access to your account there is not possible.
The end user logs in to the service they’re trying to access using the Sign in with Passkey option. The user is not asked for a username or password. They are only asked to verify with their biometric data. Depending on the device used, one of the Touch ID or Face ID options is used, and the login to the service is done.
Using Passkeys.io
This simple service is used to do a Passkey demo for you. First of all, you need to go to the Passkeys.io website. Passkeys.io is not the only web service in this area; if you wish, you can also do the same trial with the Webauthn.io site.
In the first step, you’re expected to enter your email address to create an account.
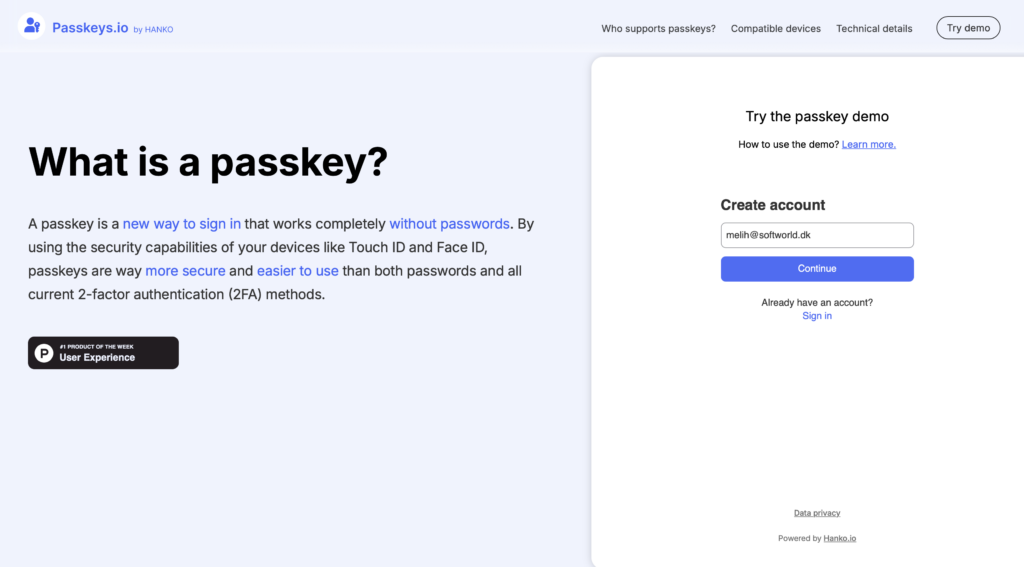
After entering your email address and clicking the Continue button, it asks you to create a Passkey.
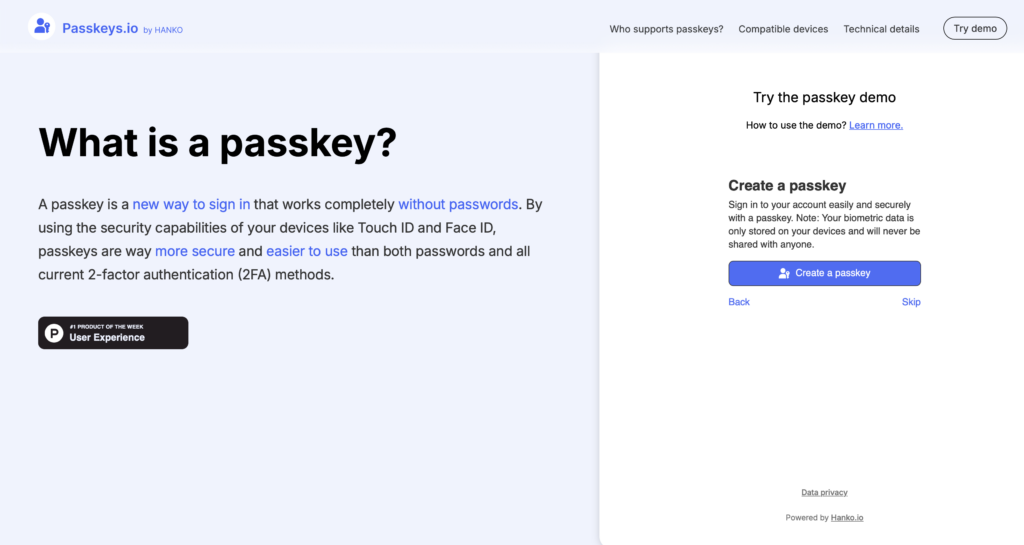
When you click the Create a passkey button, it requests a biometric input to which the Private Key will be bound.
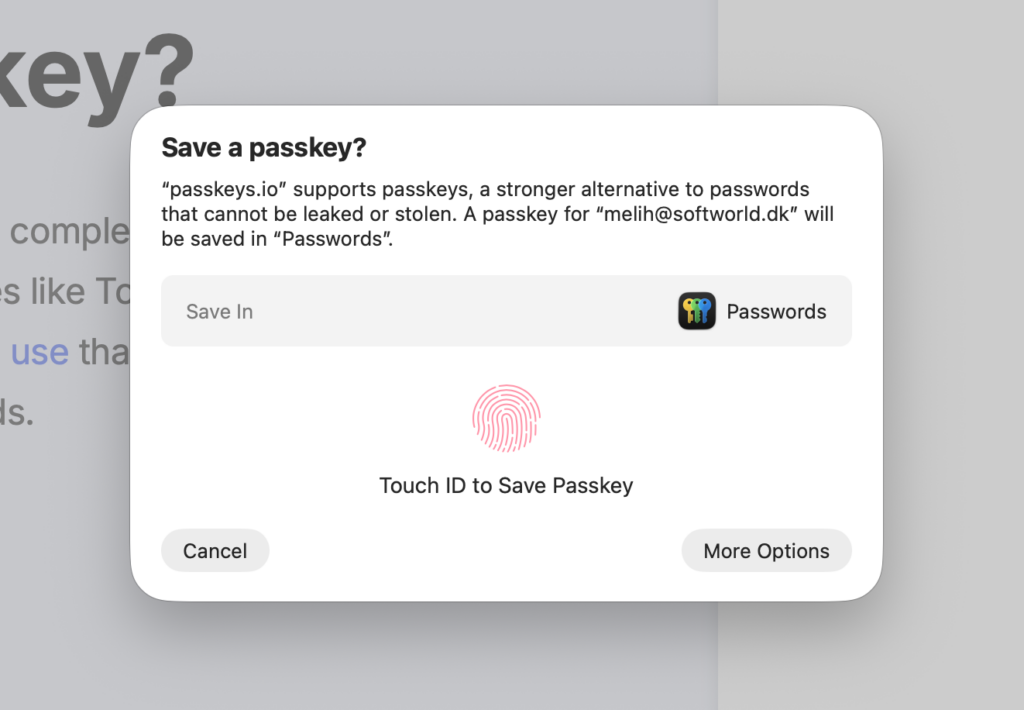
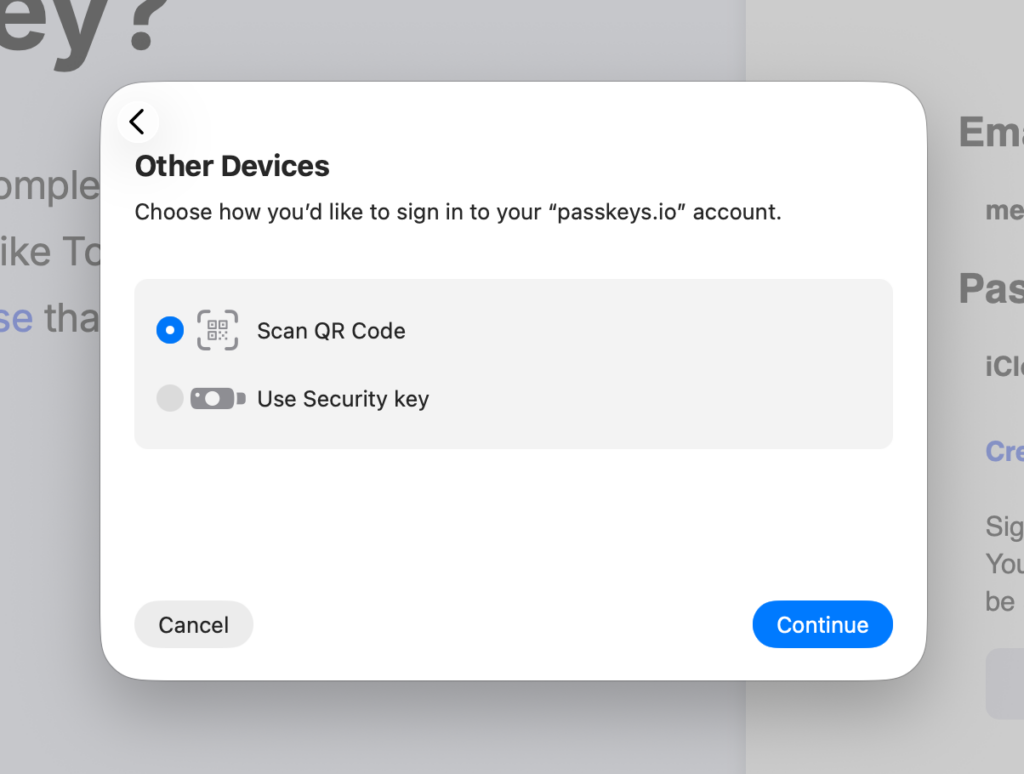
After you register your fingerprint or your face, this Private Key is stored in the Passwords application (that is, in the Keychain). If you want to do the verification not with biometric data but by scanning a hardware key or QR code, you can click the More Options button instead of scanning your fingerprint while the above screen is in front of you. After this, a second screen will come up where you can proceed in the direction of whichever login method you prefer.
Since the Passkeys.io website is only a Passkey demo, when you log in to the service, all you can see is the details of the Passkey you created.
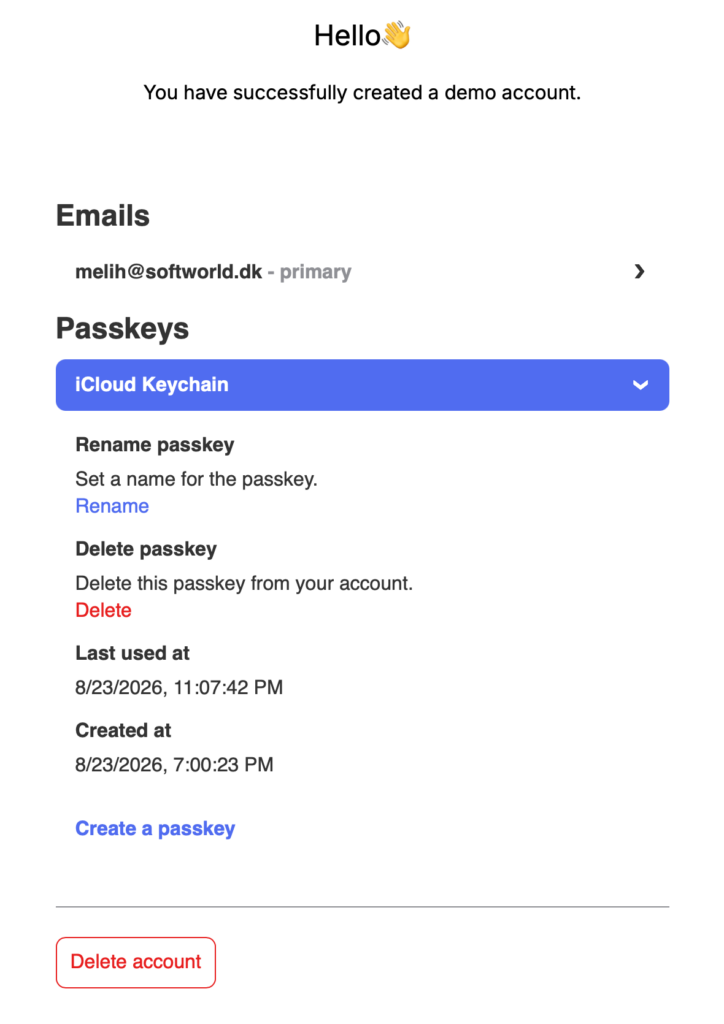
Photo by Jan van der Wolf: https://www.pexels.com/photo/colorful-locker-with-key-in-bright-red-door-33009524/
Leave a Reply